User Interface
Login page
url: http://localhost:8000/ui/index.html#/
This will be the default page for users who are not signed in. There is a username and password field used for signin. A successful login will redirect the user to the Browse operations view.
Site Navigation
Top Nav
At the top of the site is a navigation bar that features three key elements. From left to right they are the site logo (which returns to the "browse operations" view when clicked), search bar (TODO: does it work?), and sign out button.
Side Nav
On the left-hand side of the screen is a navigation column that lets the user access the different views across the application. The links in this side bar take the user to the four main views across the application. The links and their associated views are:
Operations: Browse Operations viewSchema: Browse Schema viewConfigure: Configure Settings viewGuide: (Previously "About") A link to a hosted version of the documentation here
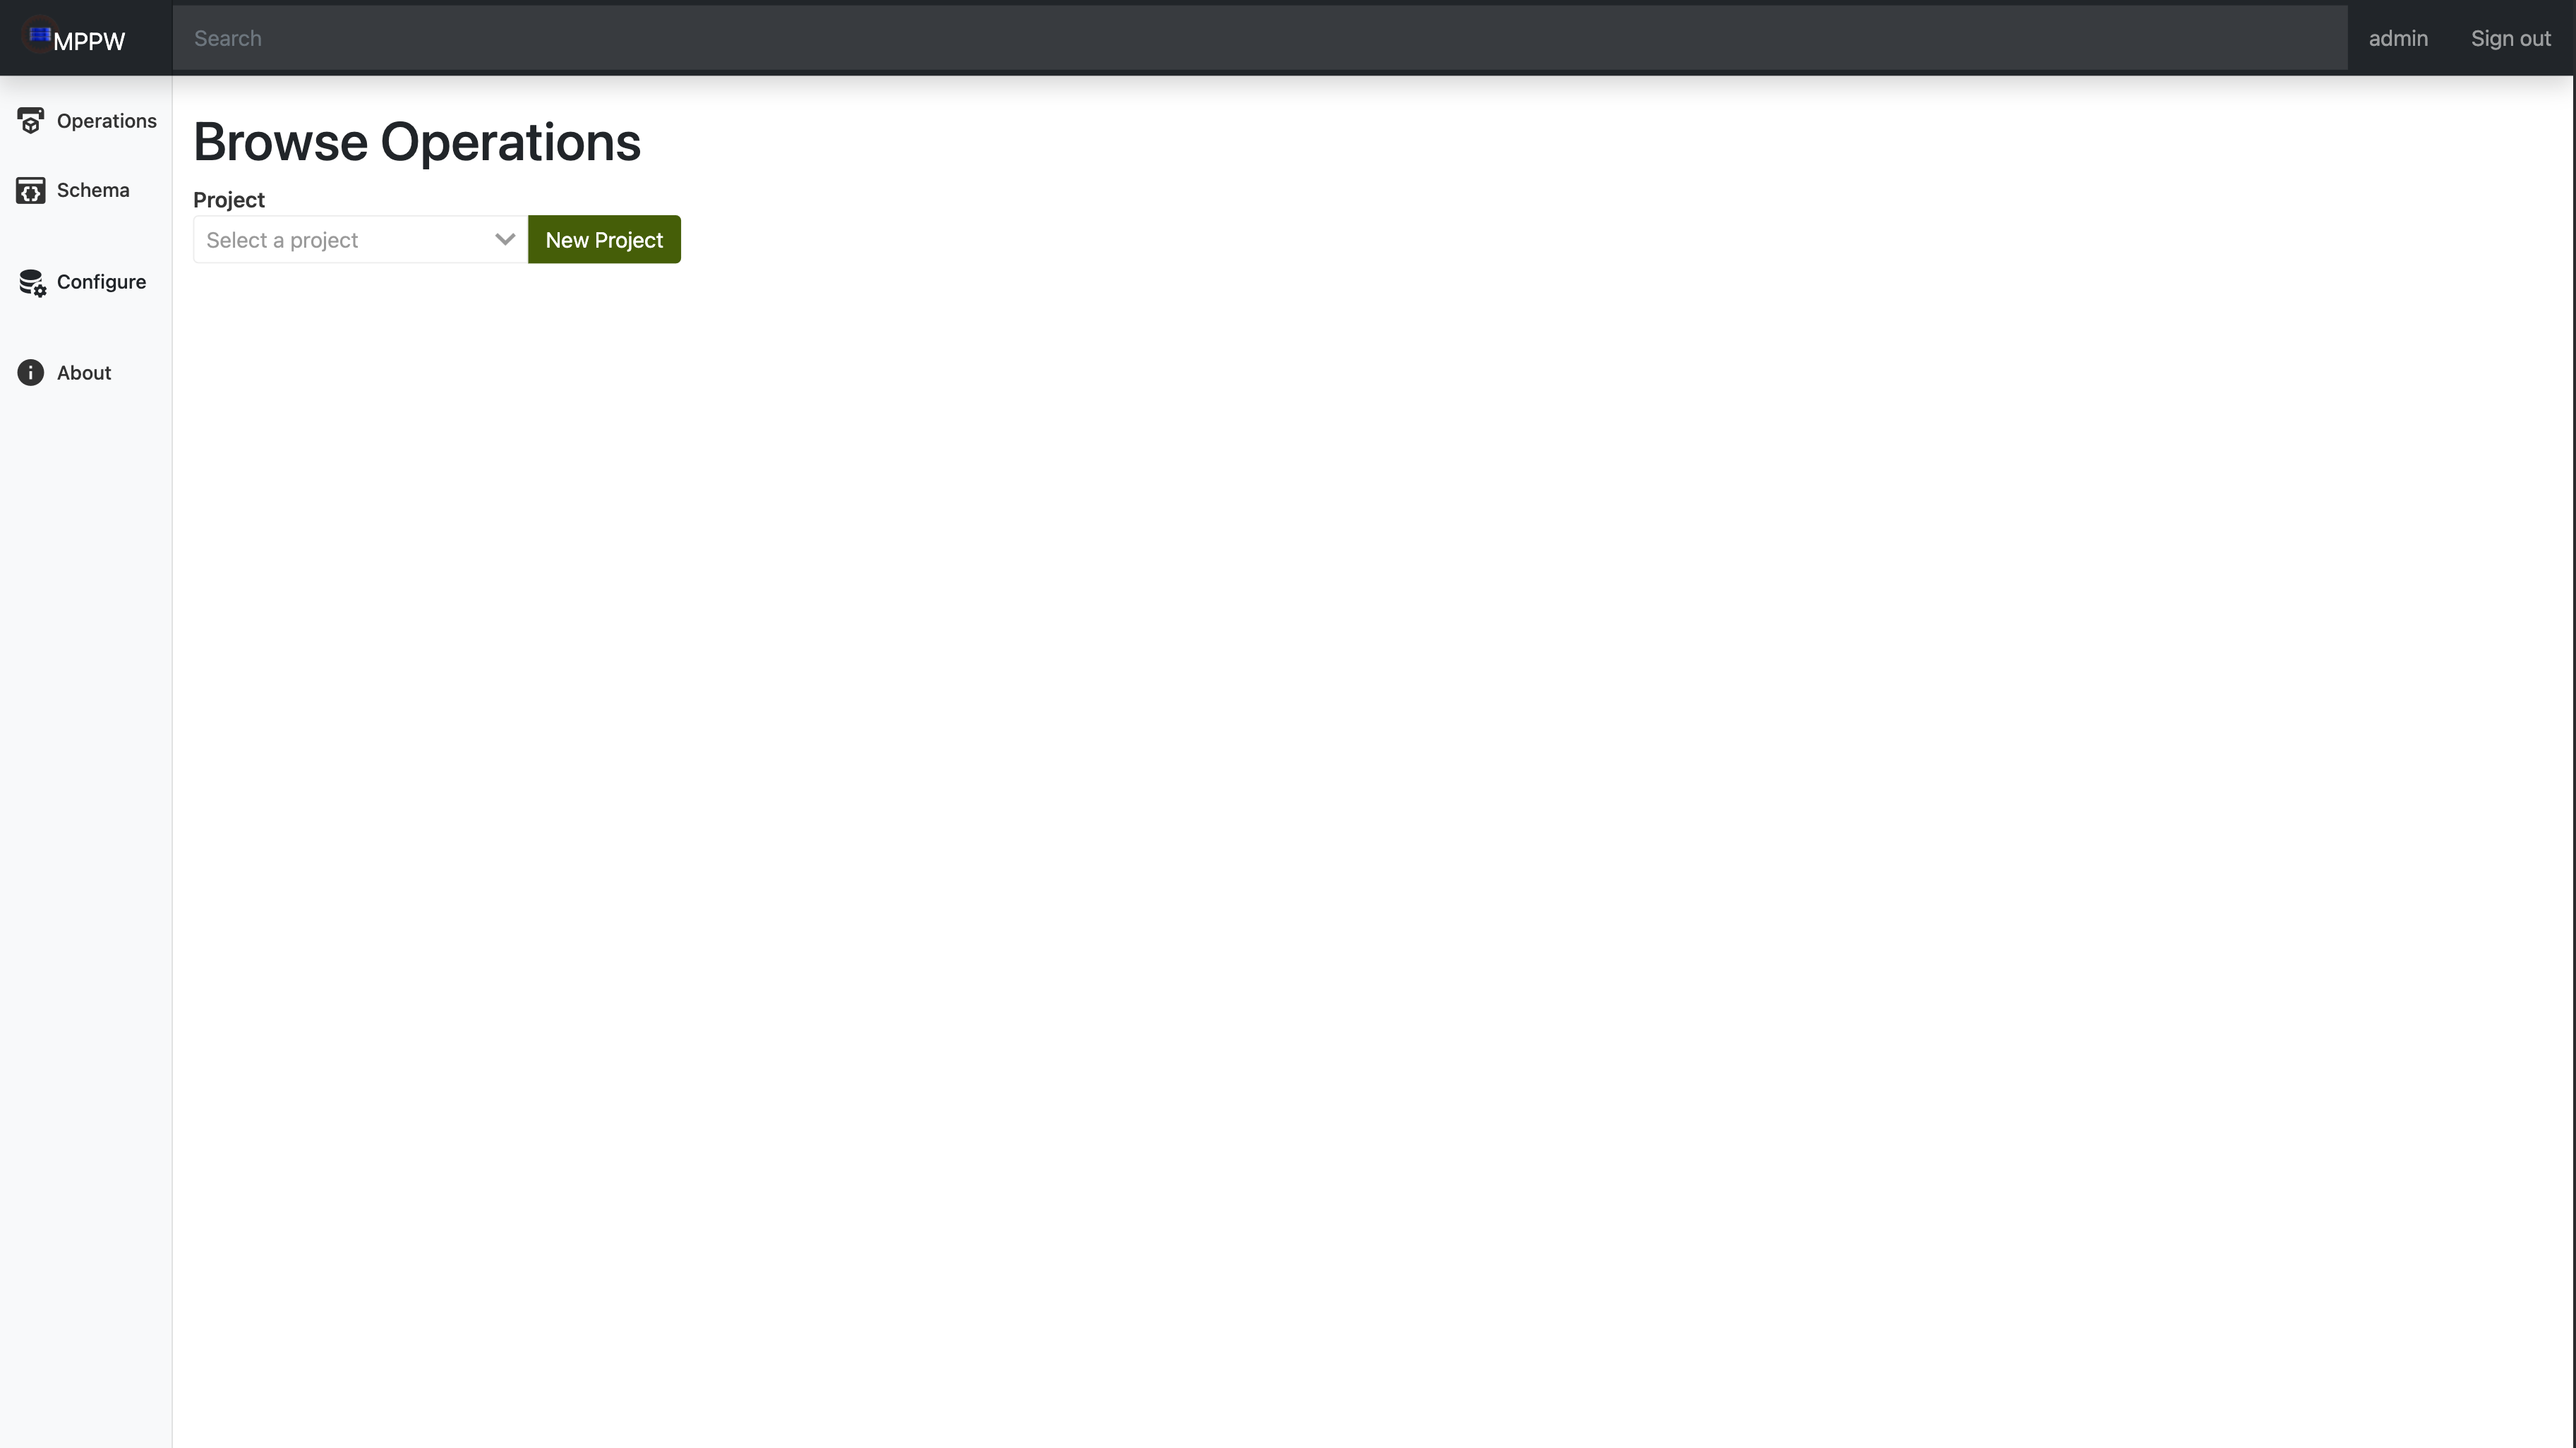
Browse Operations View
url: http://localhost:8000/ui/index.html#/
This acts as the landing page for the site once the user is logged in.
First the user will need to select a project from the dropdown which will
display all the associated operations on that project, as well as allow the
user to create new operations.
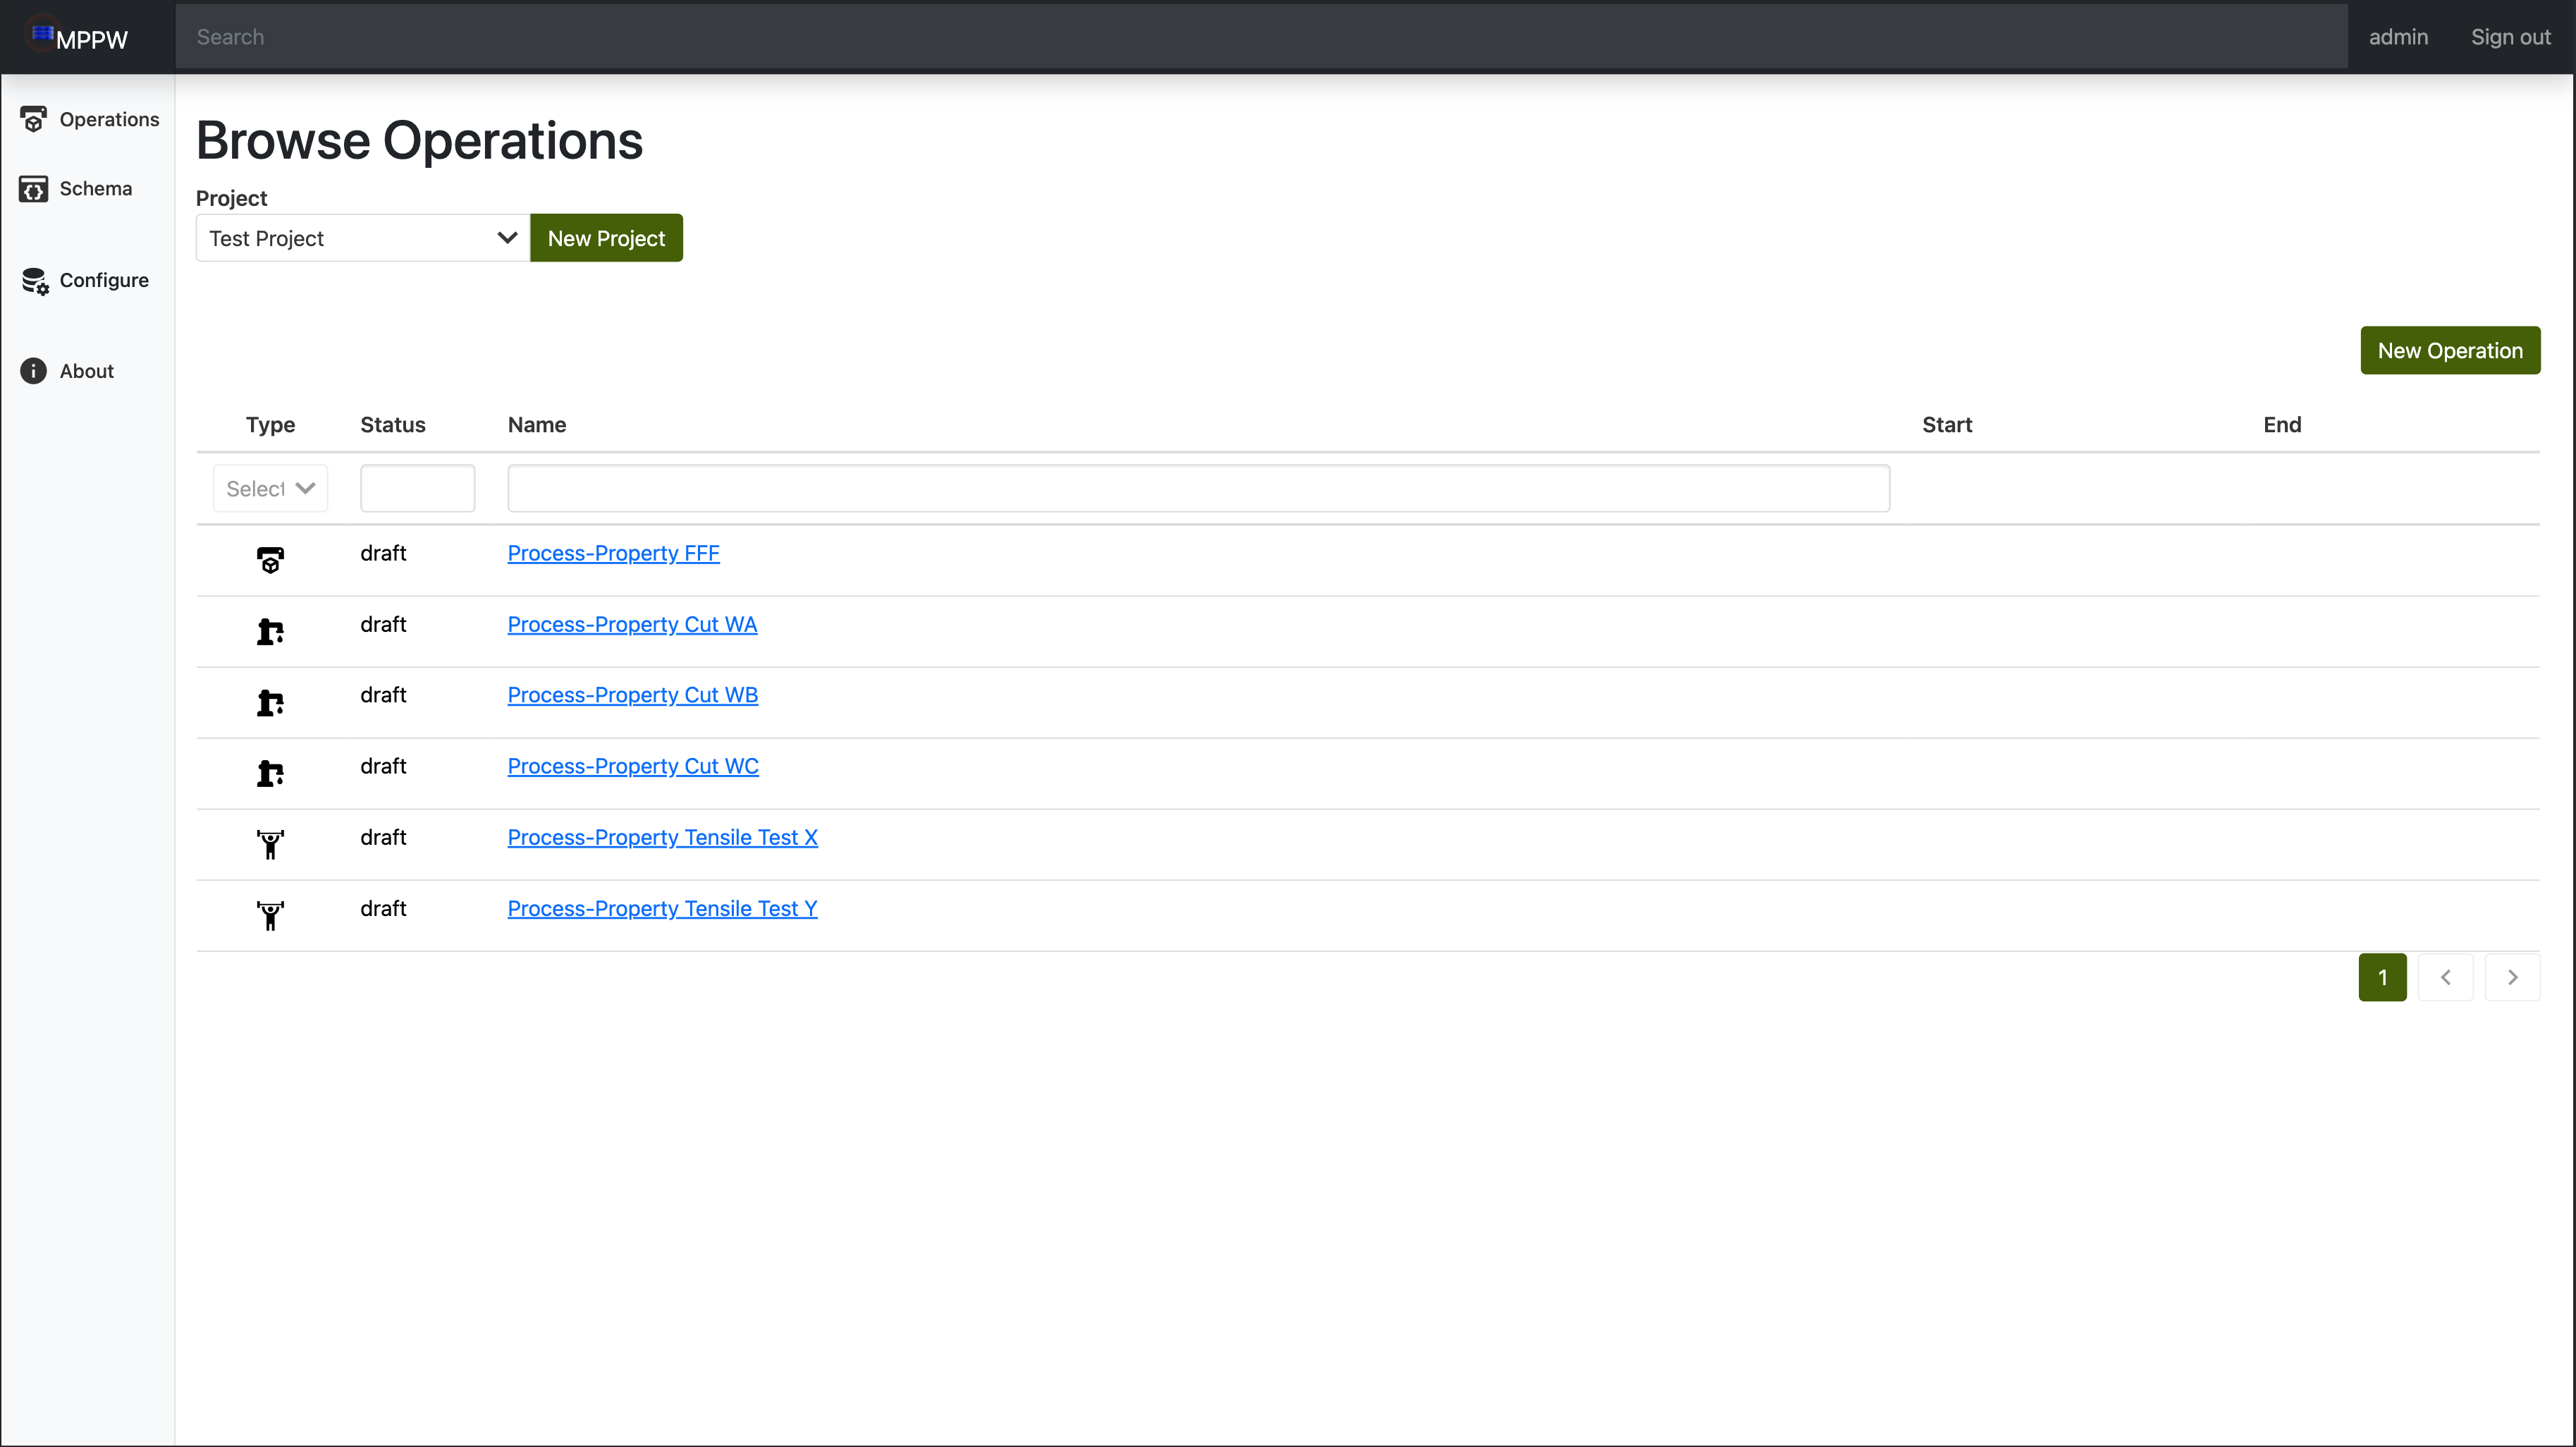
clicking the new operation button will open the Create Operation view which has fields for operation name, description, and type. By default, several types are included on MPPW, however a user can create their own through the Browse Schema view and then will be available here.
There are several filters available to find operations in larger projects: Type, Status, and name.
Each operation row has 5 columns:
Type: an icon denoting the type of operation (the type name can be displayed by hovering over the icon)Status: The status of the operation, i.e. draftName: The name of the operation, with a link to view the operation itself.Start: the start time of the operationEnd: the end time of the operation
Operation Details Page
url: http://localhost:8000/ui/index.html#/operations/{operation_id}
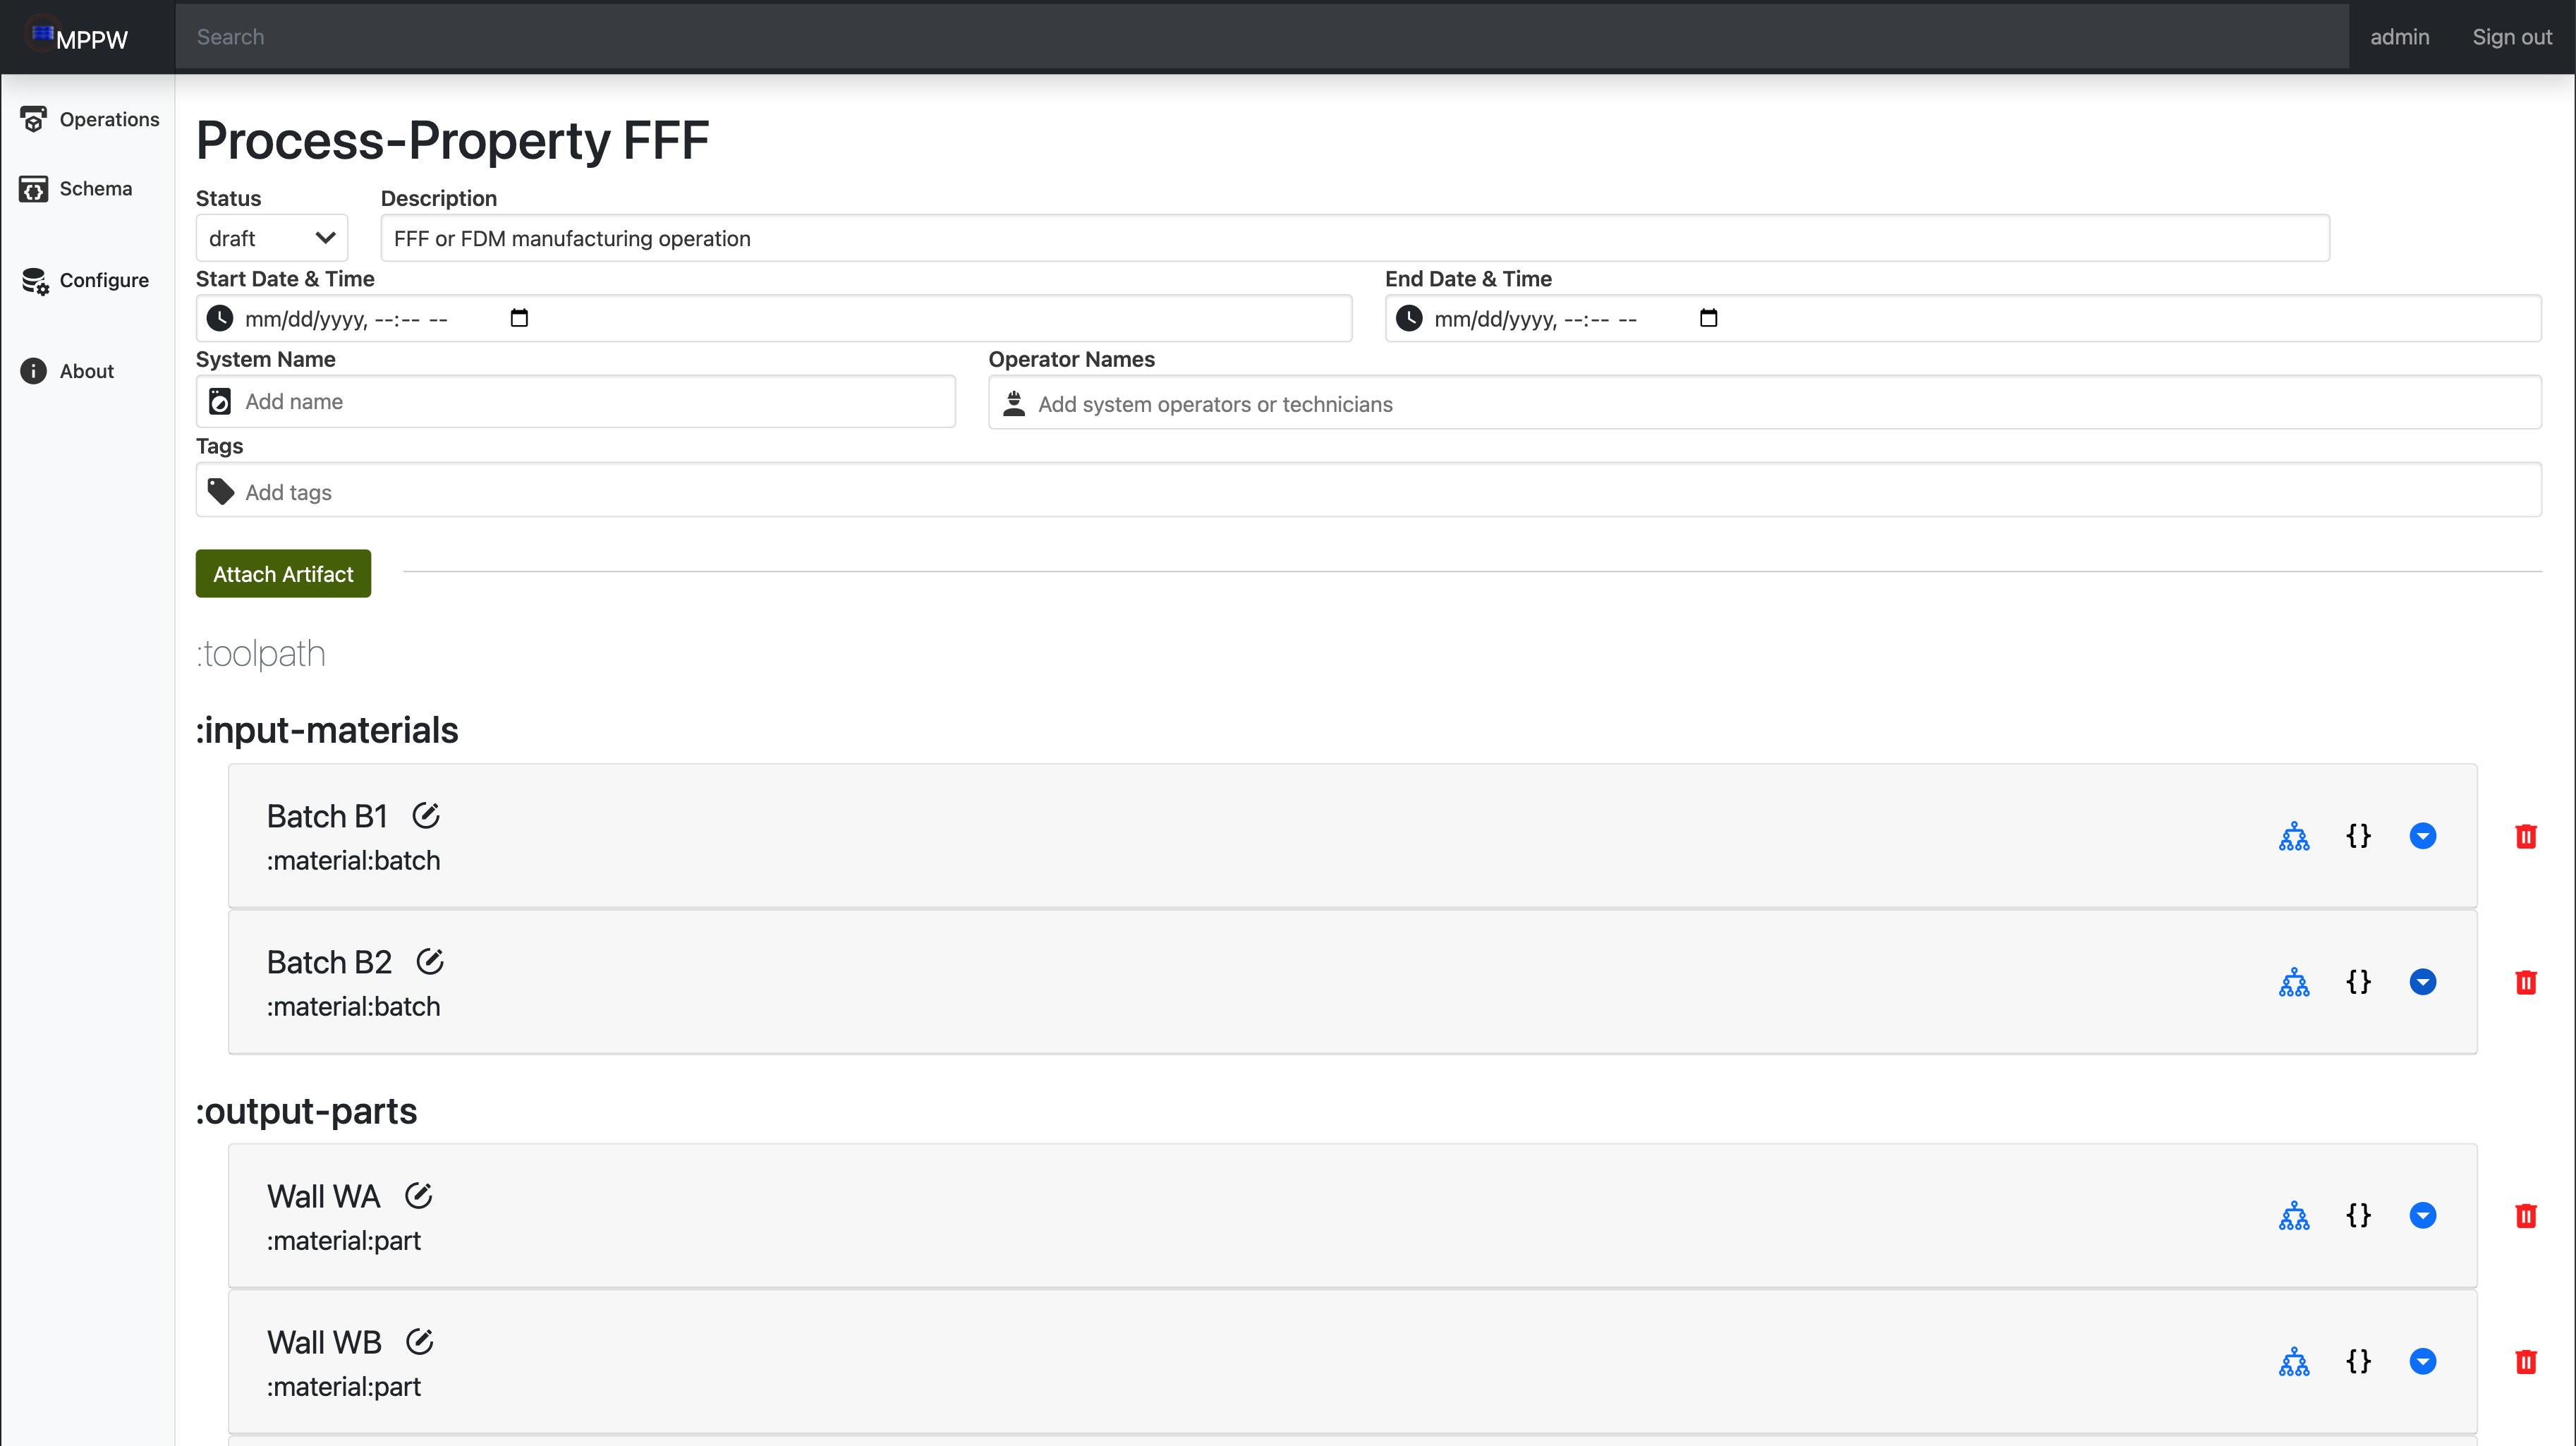
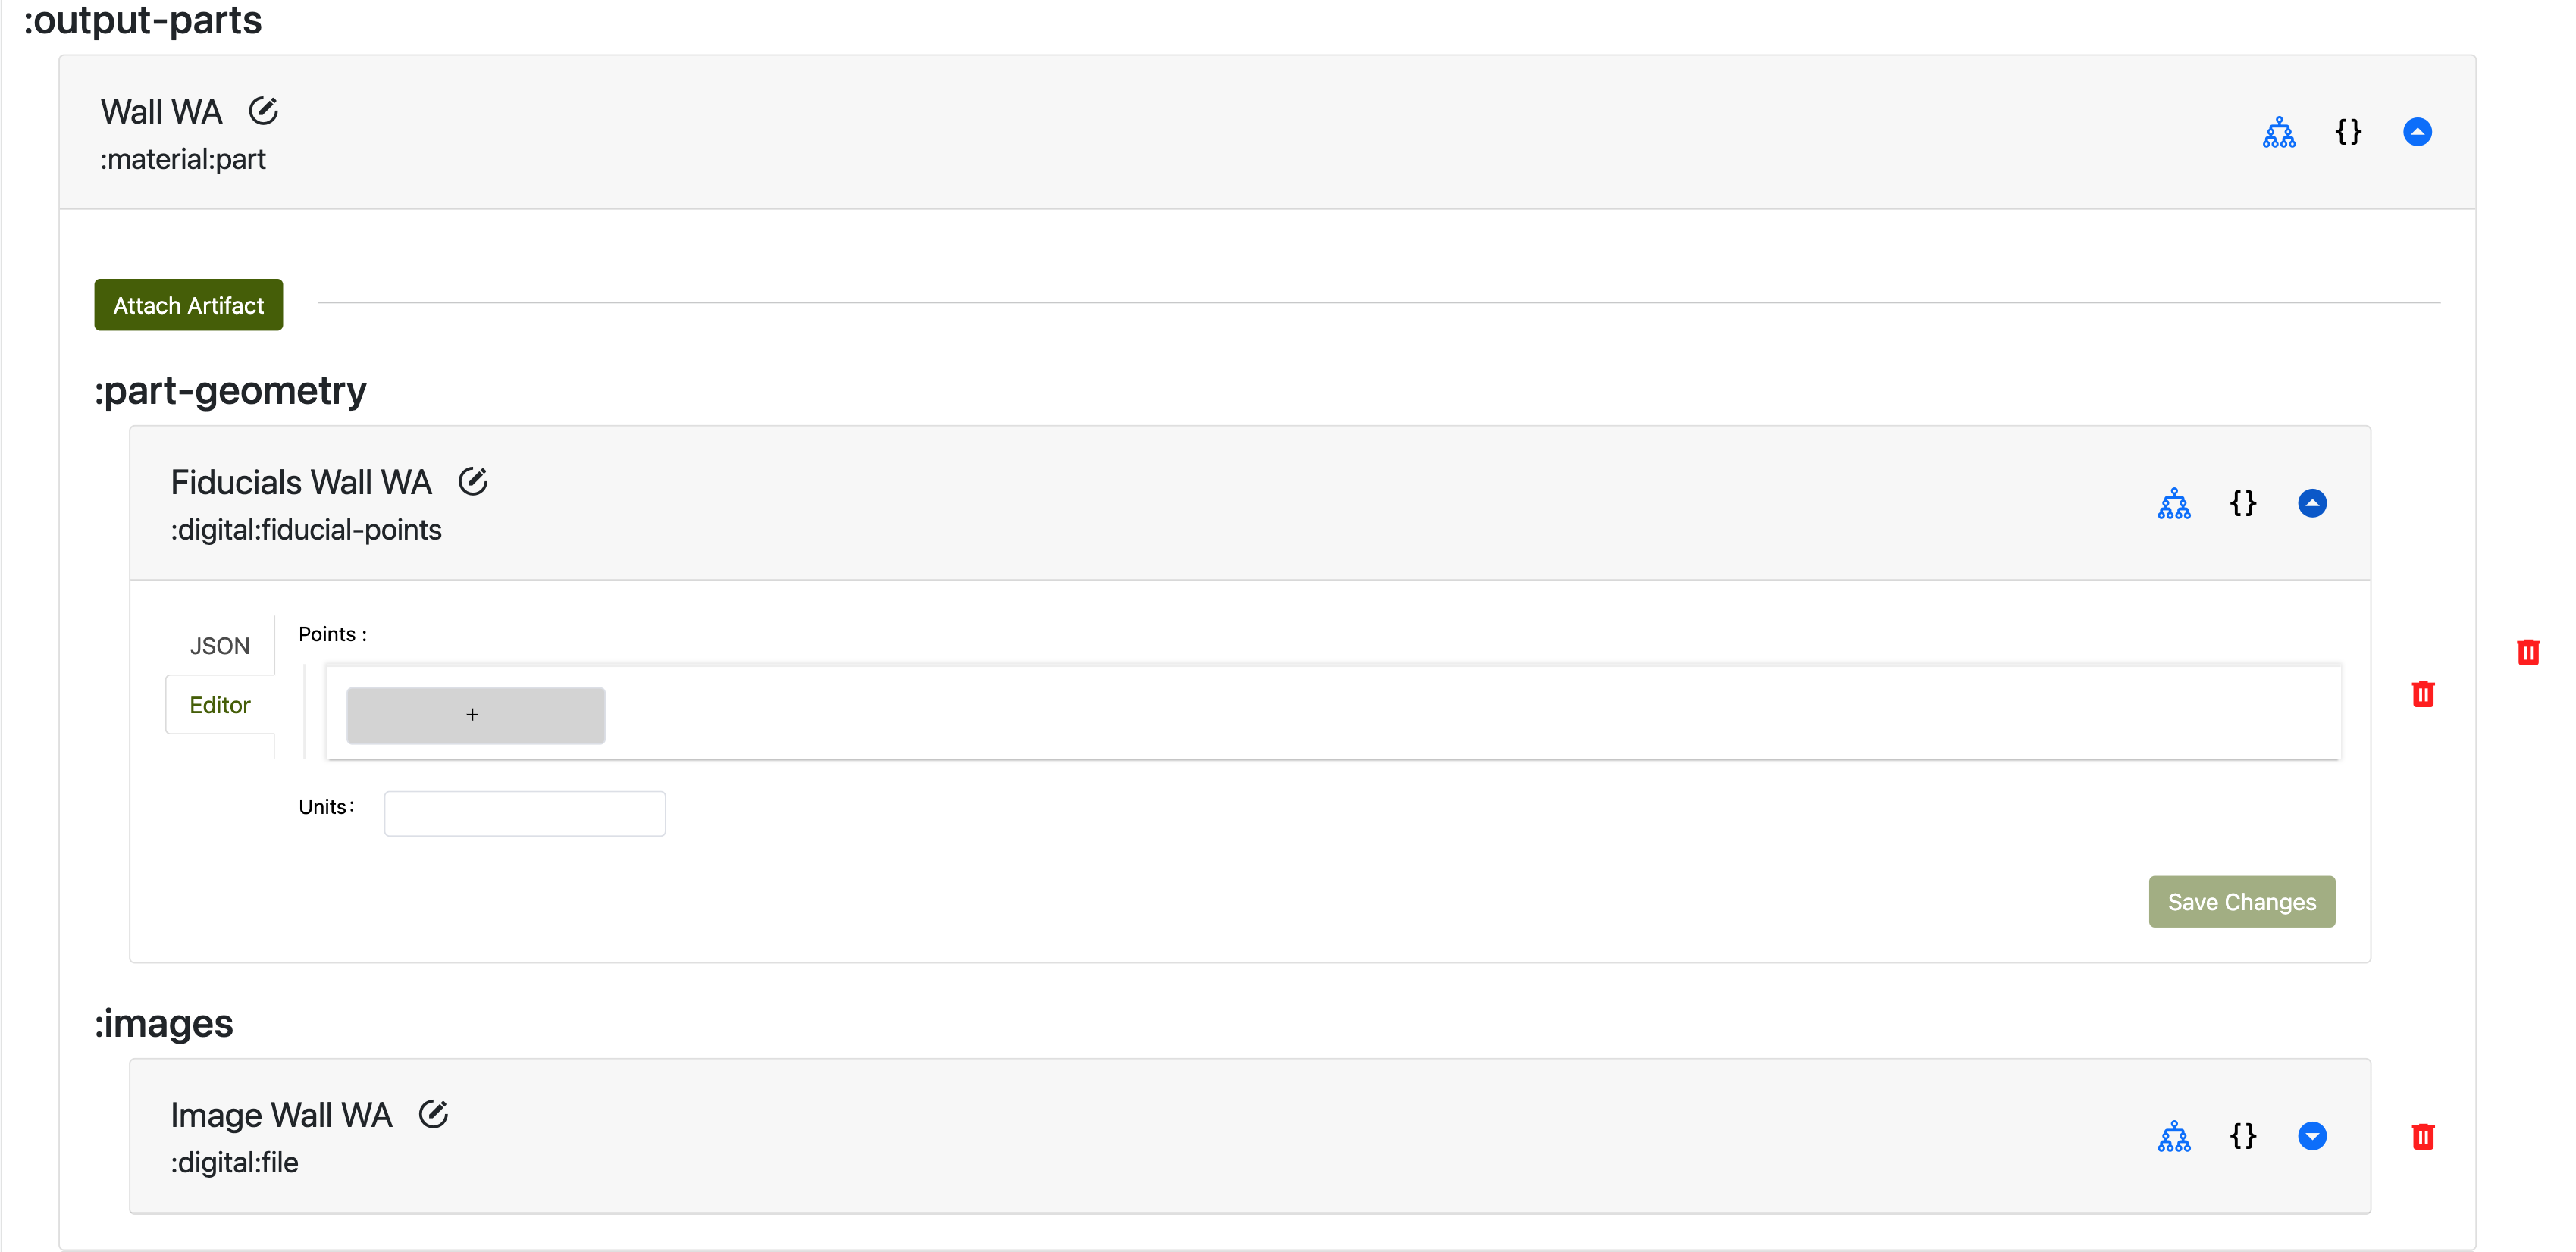
This view is split between two parts:
Operation details, which cover basic properties that are common to all operations such as name, date, and tagsArtifacts, which is a list of all associated artifacts on the operation, for example all :input-materials will be group together under a :input-materials header.
Artifact View
By default all artifacts start collapsed, and can be expanded for more info.
Each artifact has five buttons in the collapsed view:
Edit: denoted by a pencil in a circle, this will open the Artifact Edit view which allows the user to change the artifact name, description, and tags.Provenance: Denoted by a graph icon, this will open the Provenance view for the associated artifact.JSON: denoted by open and closed curly braces, clicking on this icon will console.log the associated json of the artifact. Hovering will also display this info in a tooltip.Collapsetoggle: Denoted by an up/down carrot icon, clicking this icon will expand or close the artifact, displaying additional information.Delete: Denoted by a trashcan, this icon will delete the artifact from the operation. There is a confirmation prompt after clicking this to ensure none are deletated by accident.
If the artifact belongs to a different operation, there will be three new buttons:
Operation Link: Denoted by a hyperlink icon, clicking this button will redirect the user to the operation which owns that artifact.Claim Artifact: Denoted by a dashed circle with a cursor on it, clicking this button will set the current operation as the artifact's owner.Destroy Link: Denoted by a red hyperlink icon with a slash through it, this replaces the delete artifact button. This will remove it from the operation, but leave the artifact itself alone since it belongs to a different operation.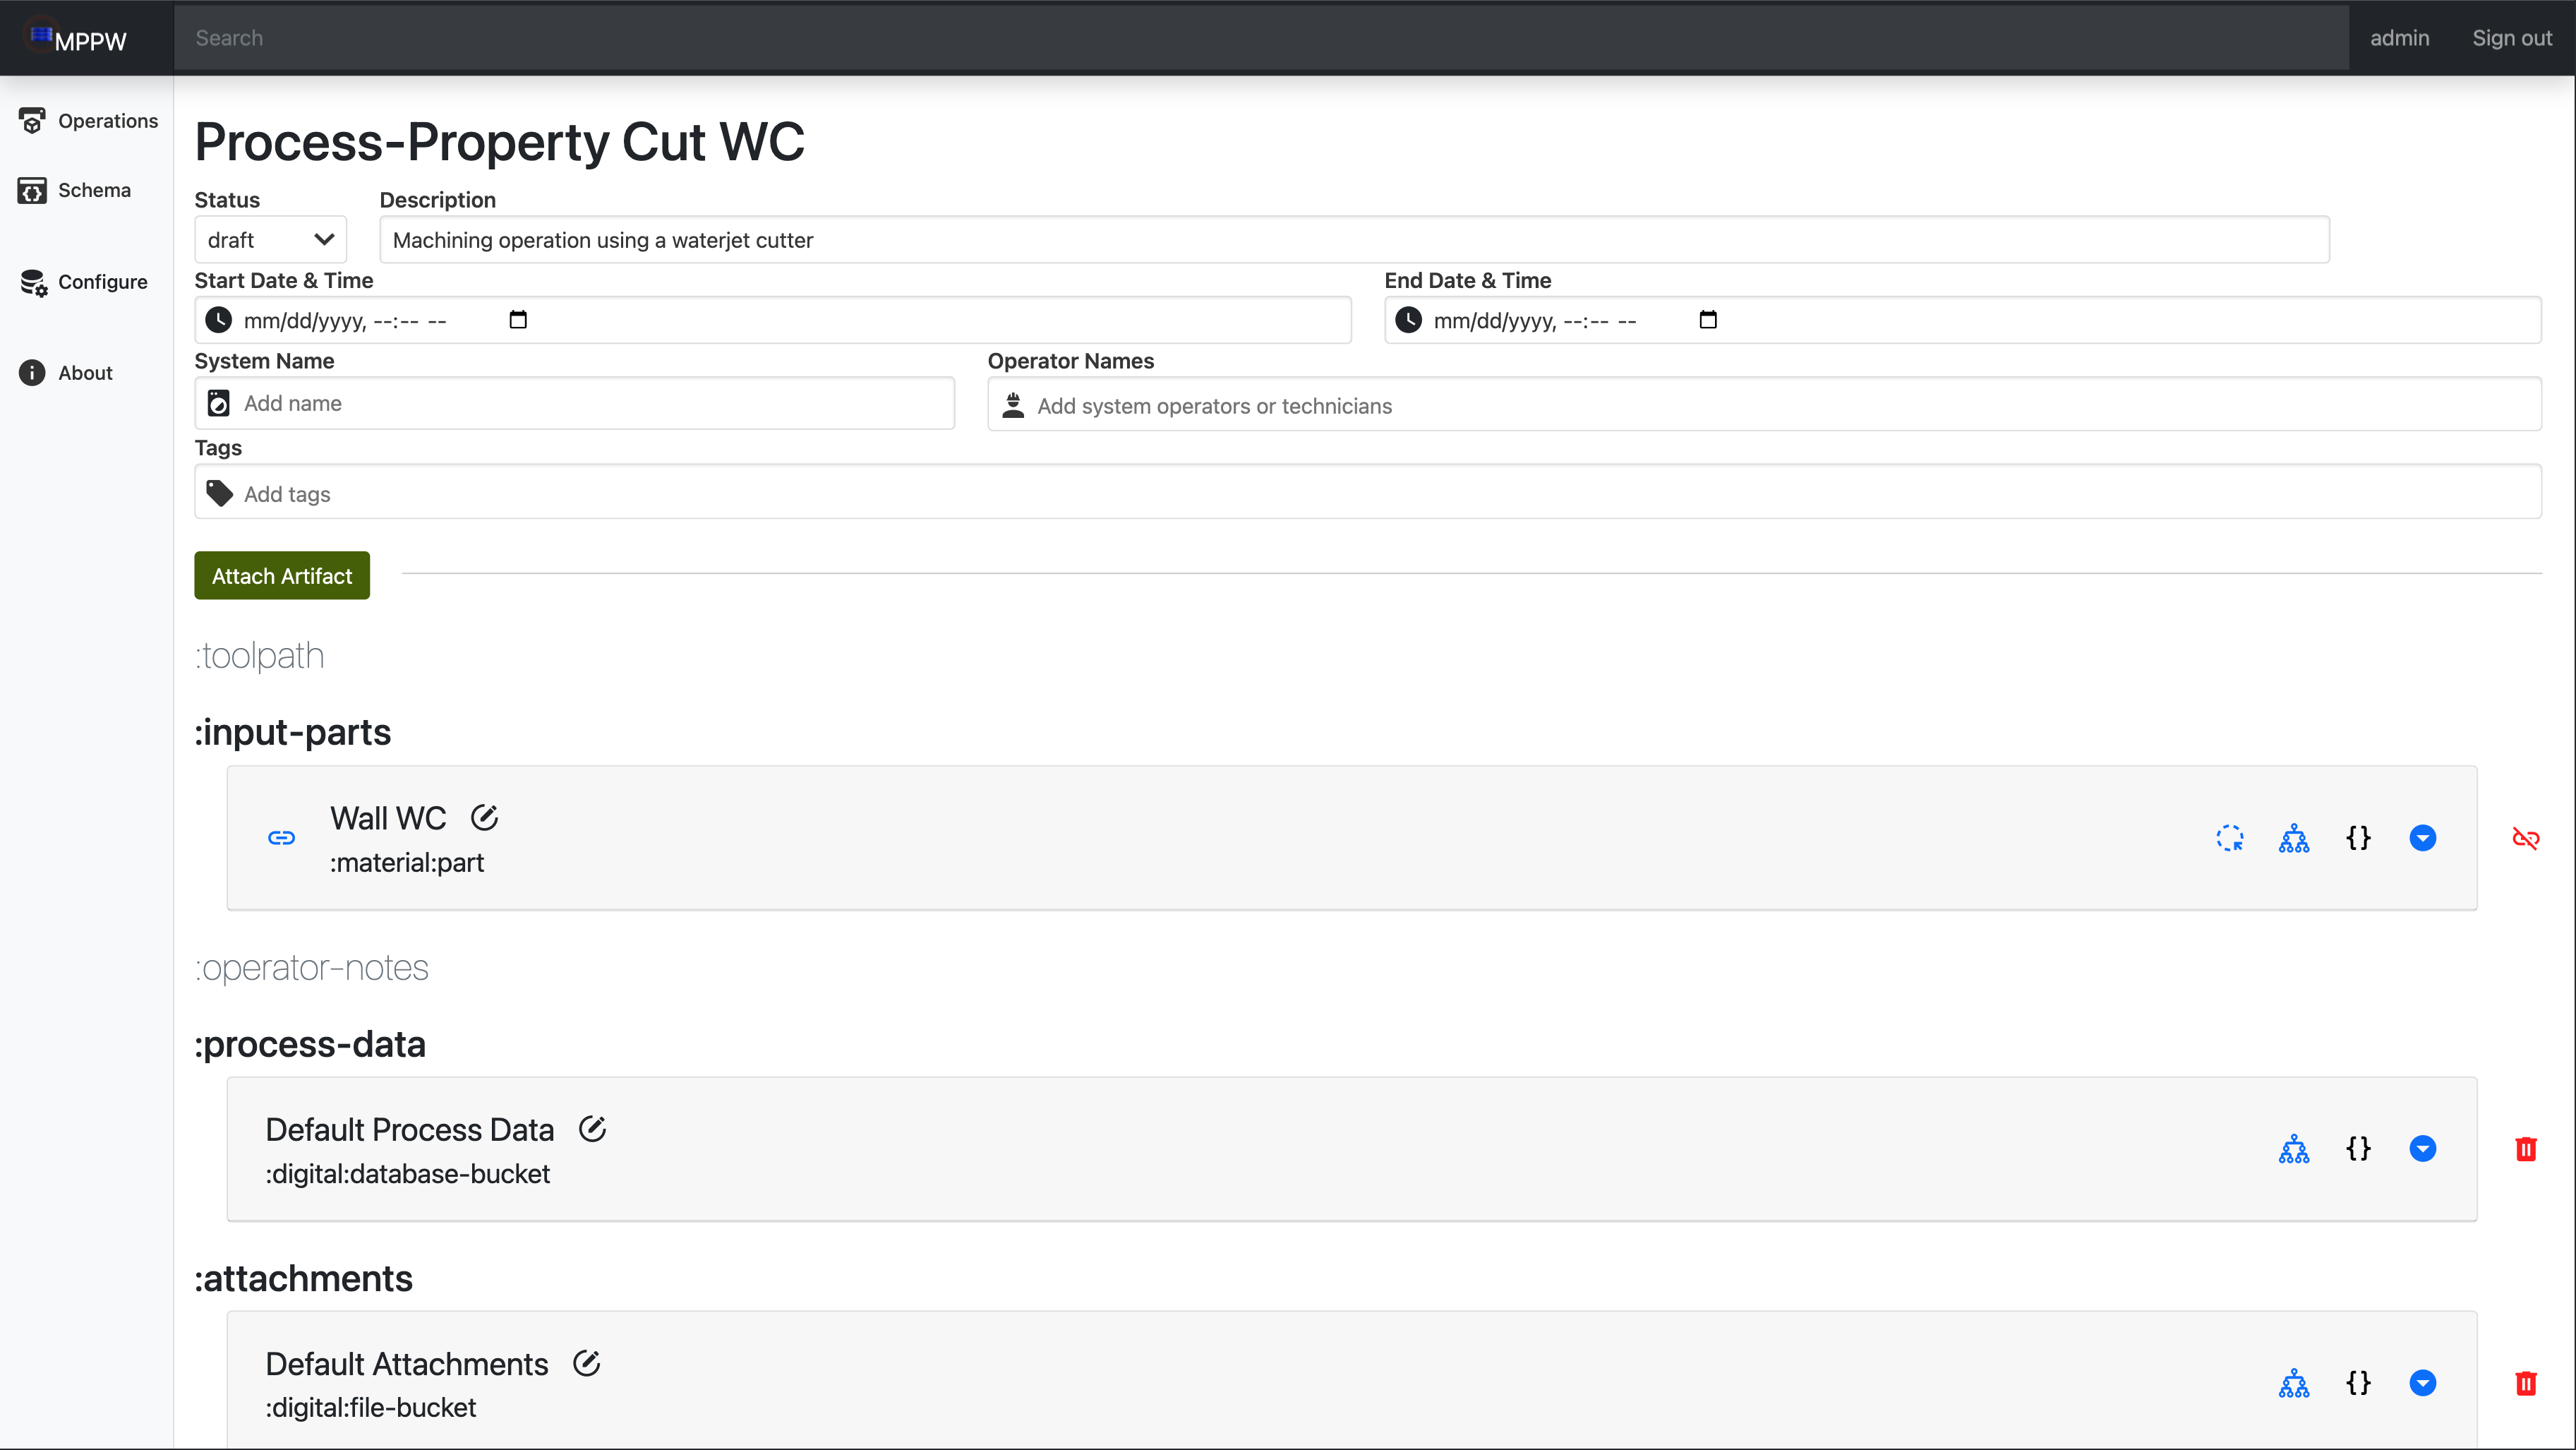
The detailed view of an artifact depends heavily on the artifact type.
(get list and show current things available)
Provenance/Artifact Details Page
url: http://localhost:8000/ui/index.html#/artifacts/{artifact_id}
This page has three sections:
- The JSON data of the artifact
- A visualization of the provenance as a a directed acyclic graph (DAG)
- The JSON data of the Provenance
Provenance
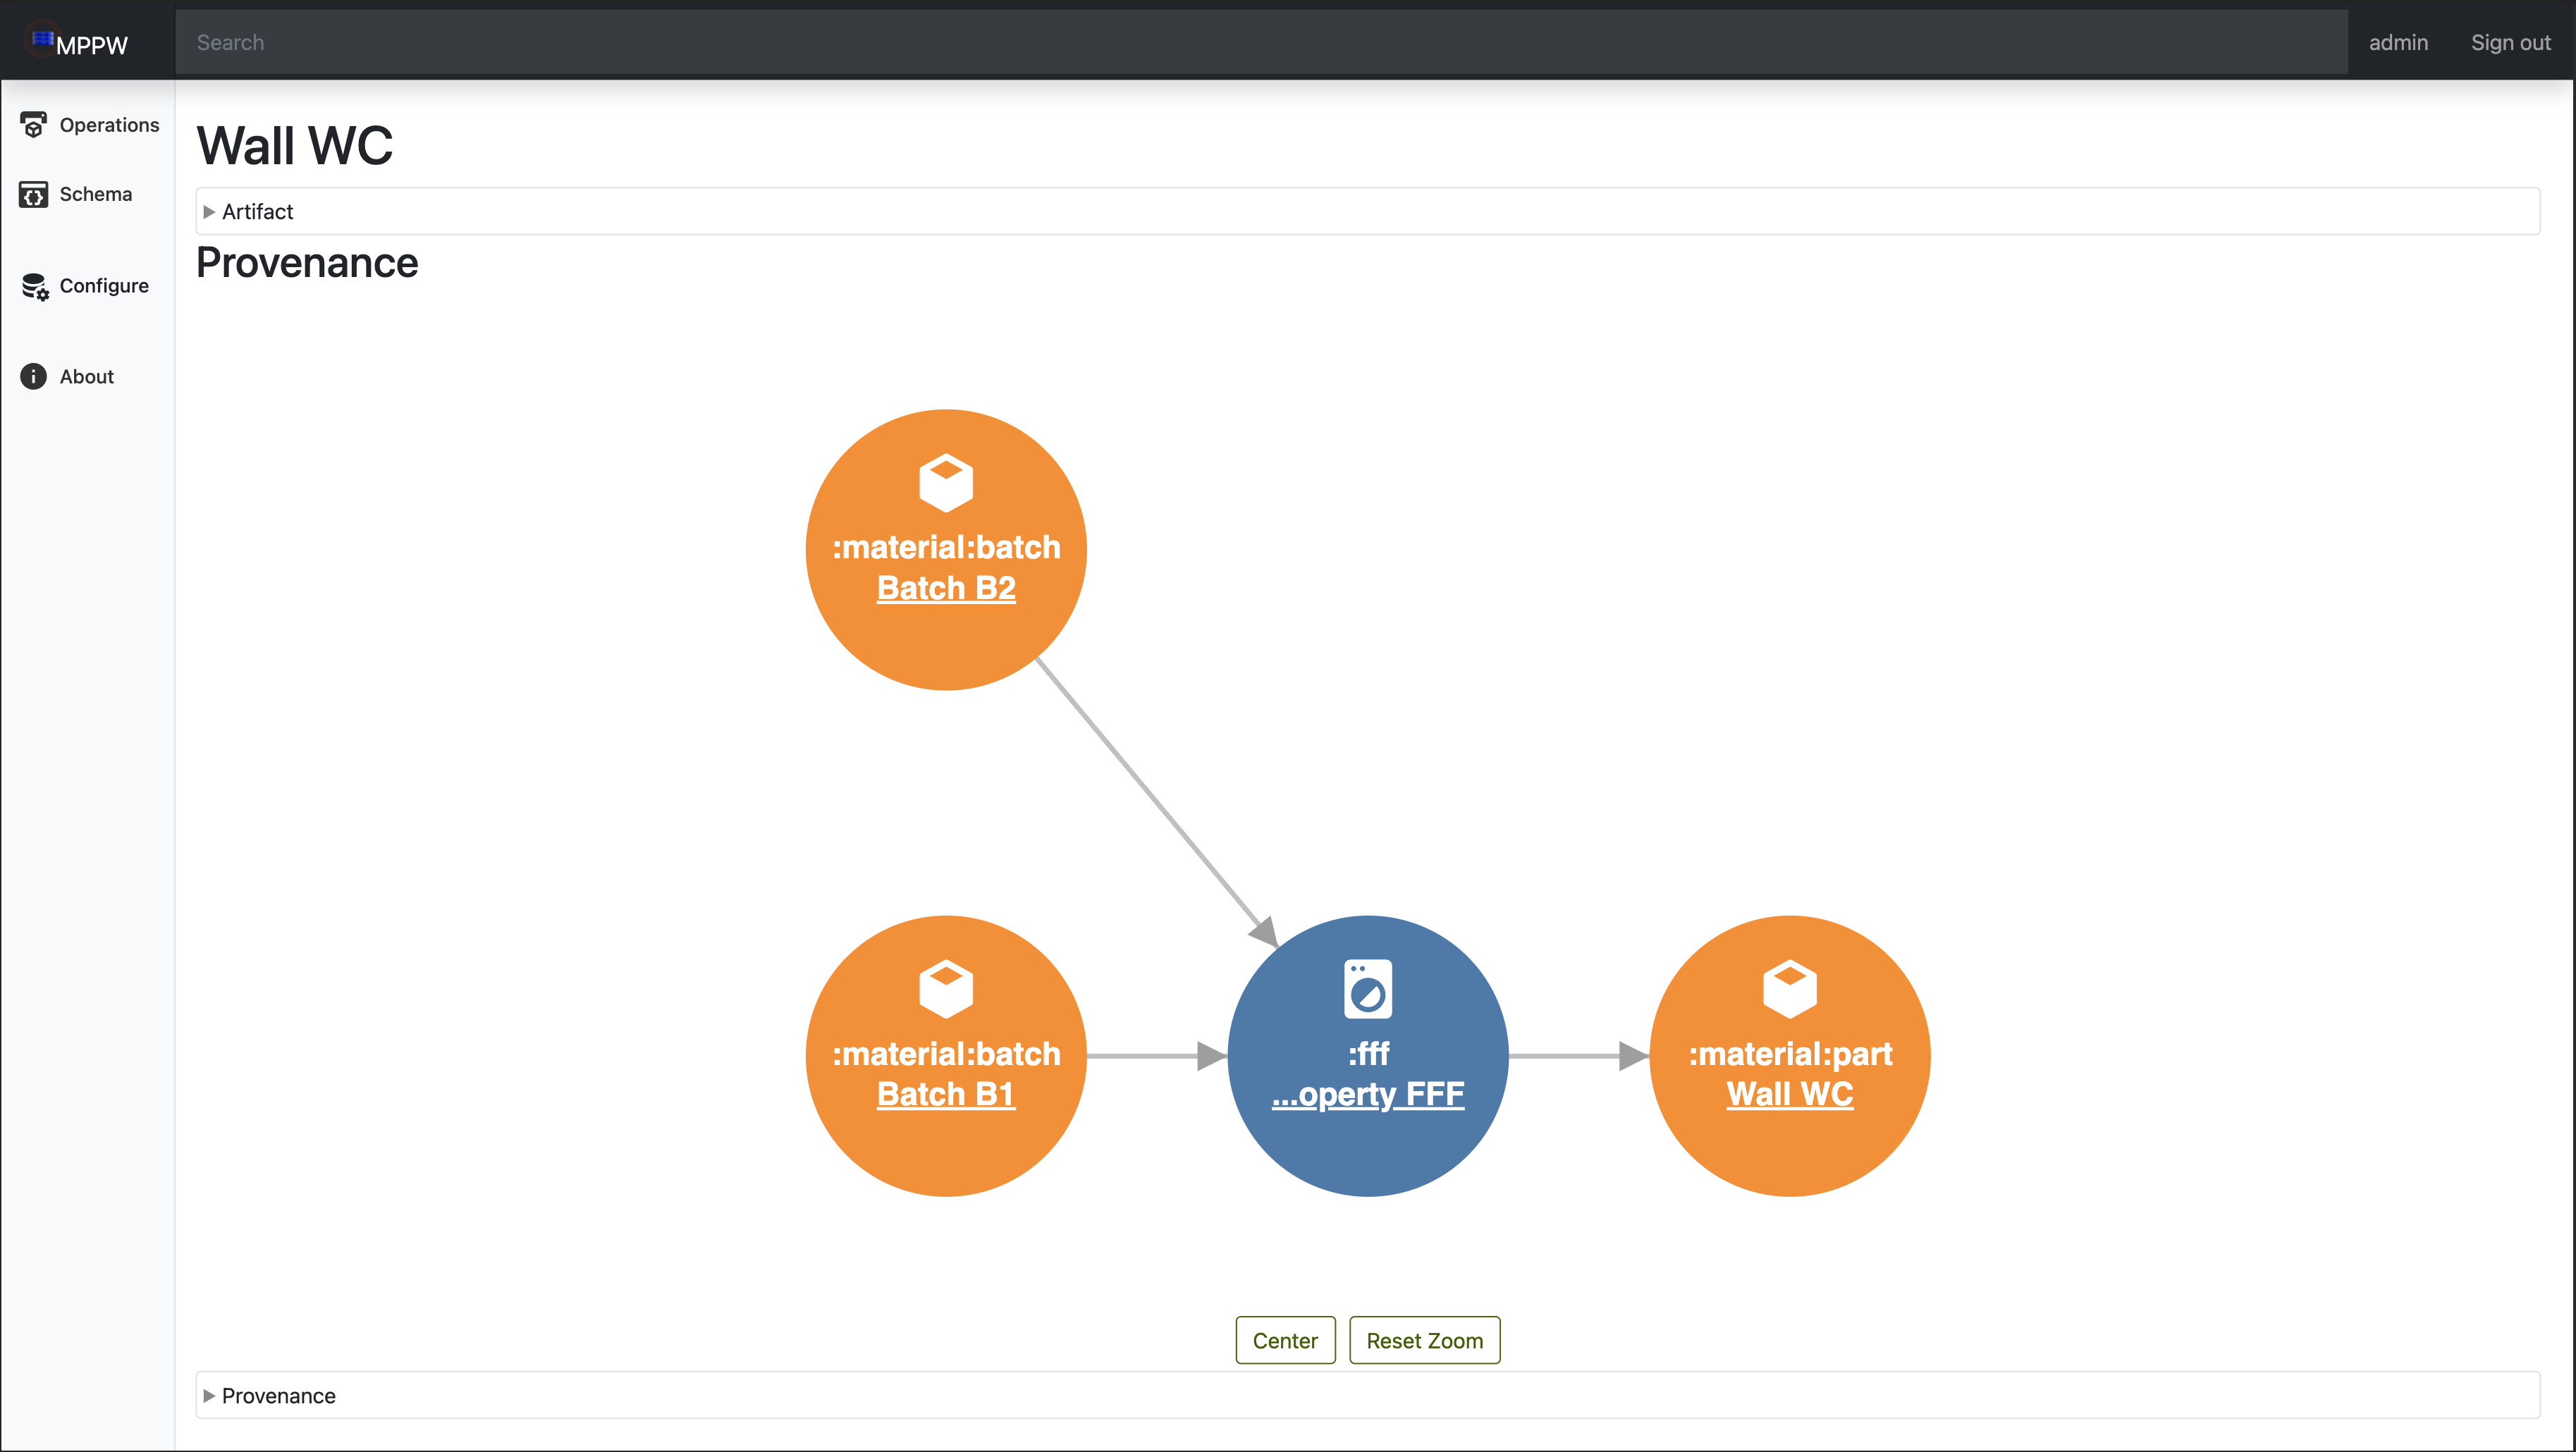 The provenance DAG is the only section expanded by default and functions to
show how the artifact relates to other artifacts and operations in the project.
The provenance DAG is the only section expanded by default and functions to
show how the artifact relates to other artifacts and operations in the project.
Controls
- At the bottom of the DAG, there are buttons that allow the user to center the DAG, and to reset the zoom so the whole dag is visible.
- By clicking and dragging, the user can move the DAG on the page.
- By scrolling or draggin with two fingers on a trackpad, the user can zoom in or out on the DAG
Nodes
As each node has a limited amount of space, they use color, icons, and short pieces of text to describe itself as quick as possible:
color: TODO Explain colors. I believe the colors on the DAG simply alternate for easier readability, but I need to confirm this.icons: TODO explain icons. Originally I believed that washing machine represented the operations, and cubes the artifacts, but this seems incorrect.type: The first line of text shows part of the operation/artifact type. For example, an operation with the typeurn:x-mfg:operation:fffwill only show:fffor an artifact with the type:urn:x-mfg:artifact:digital:meshwill only showdigital:mesh. If even this shortened form is too large for the node, it will show the tail of the type and the full type name will be available on hover.Artifact ID/Operation Name: The last line of the node will be different between artifacts and operations. Operations will have the operation name shown, while artifacts will display their ID. This line is a hyper link, and if clicked on, will send the user to Operation details page or Provenance/Artifact Details page of the node they clicked on.
Artifact
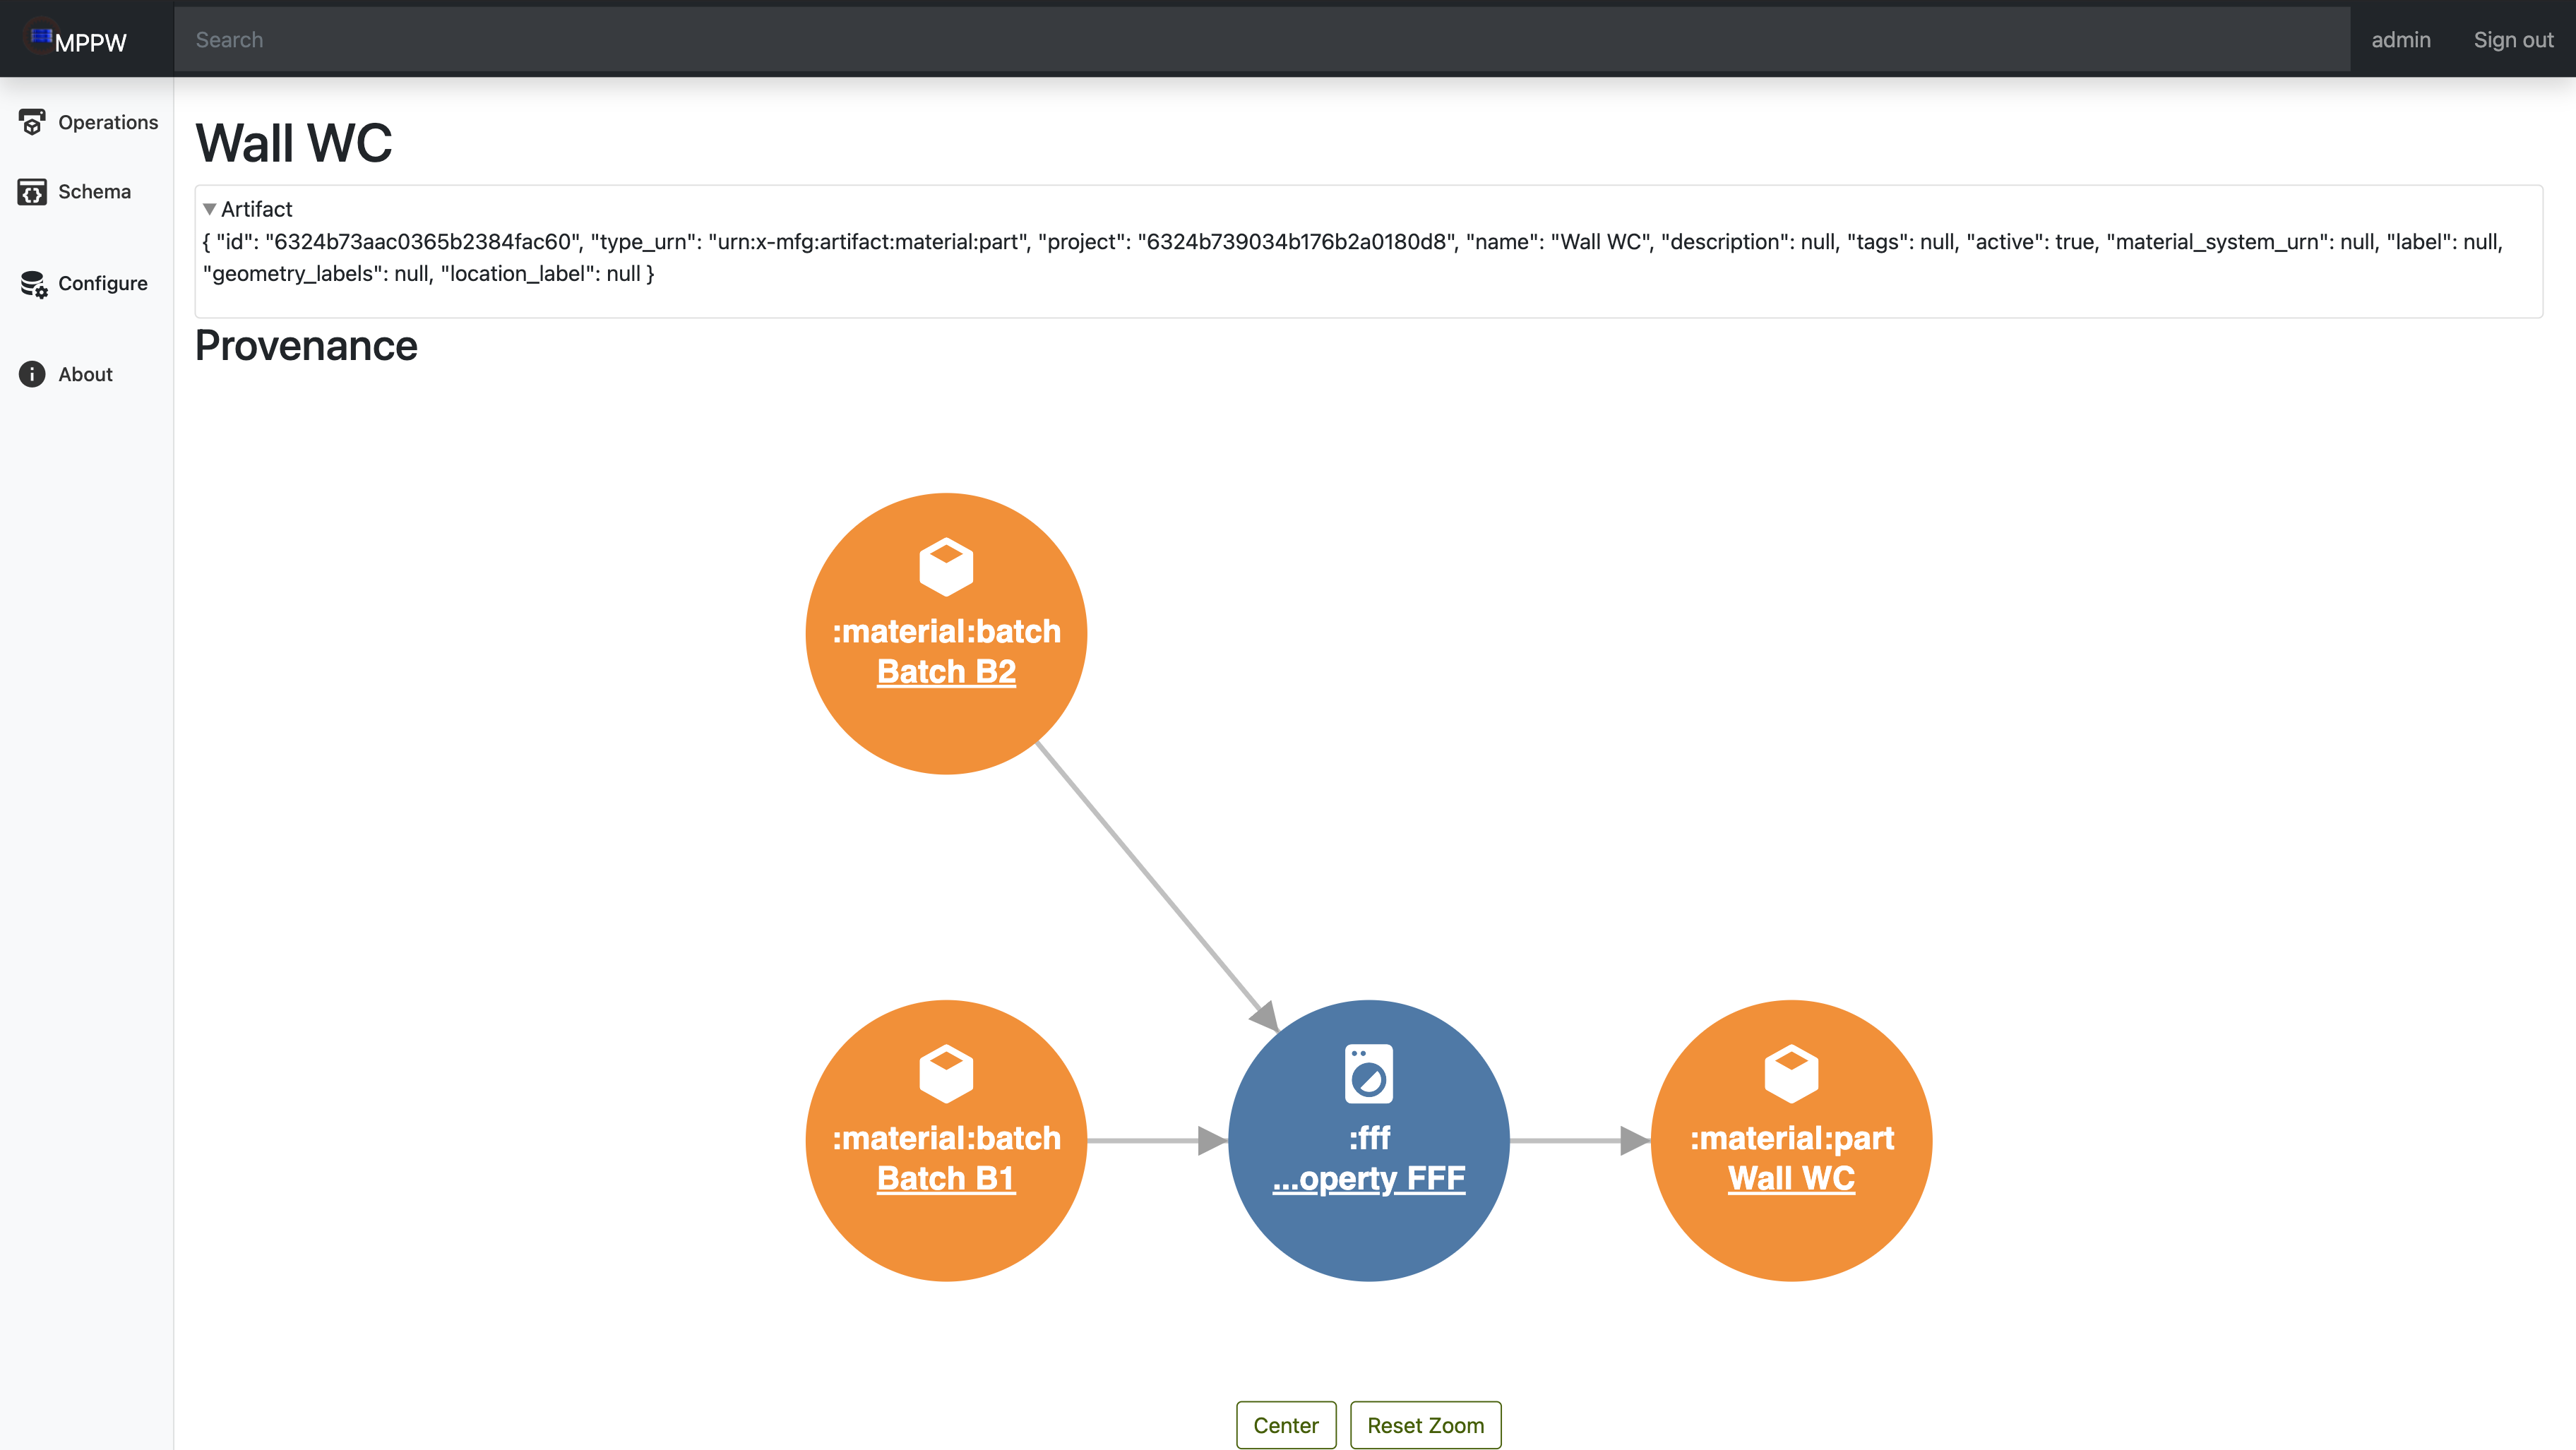 This section is at the top of the page and can be expanded by clicking anywhere
on the
This section is at the top of the page and can be expanded by clicking anywhere
on the > Artifact row. It displays all the related JSON for the artifact,
allowing the user to see useful details such as the ProjectID, its type, and so
on.
Provenance JSON
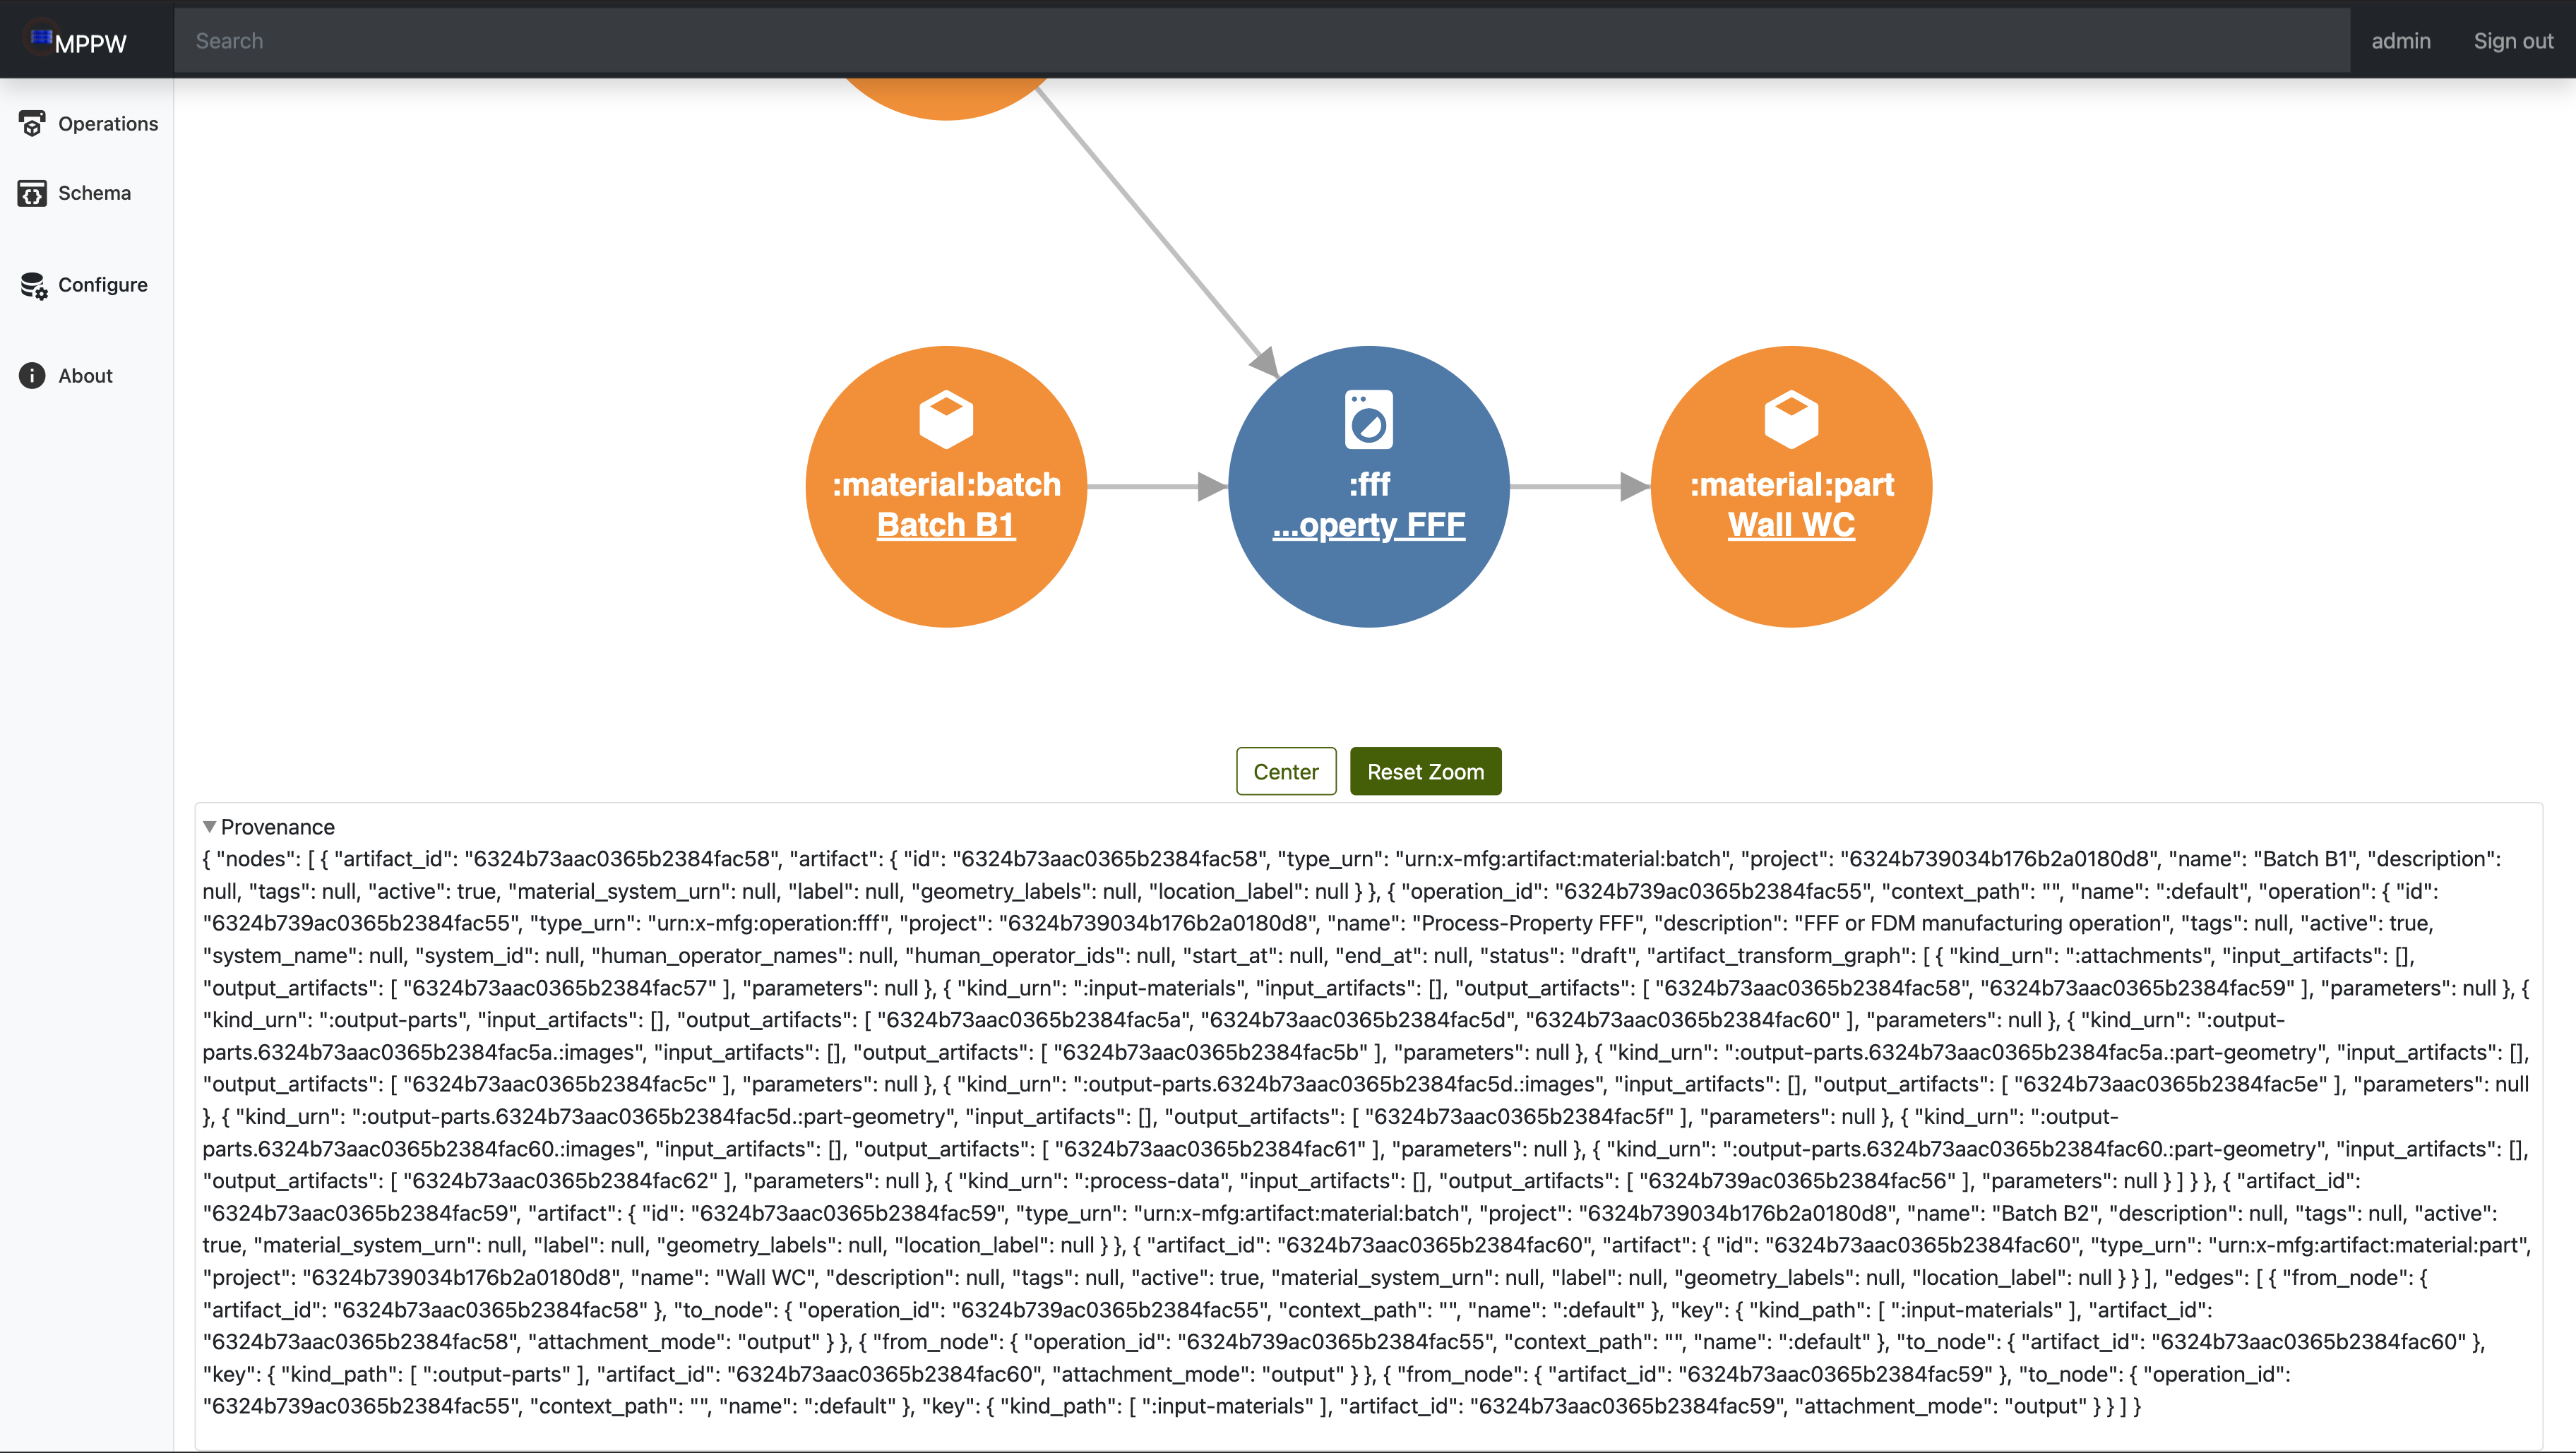 This section is at the top of the page and can be expanded by clicking anywhere
on the
This section is at the top of the page and can be expanded by clicking anywhere
on the > Provenance row. This is the JSON data used to construct the DAG
shown above it.
Browse Schema Page
url: http://localhost:8000/ui/index.html#/schema
On this view, the user can select a project and access all the current available operation/artifact schemas as well as create new ones.
To select a project, select the dropdown and select your desired project. This will display all the associated schemas.
Each schema row has 6 six columns:
edit: denoted by an icon of a pencil in a circle, this will open the associated schema and allow the user to edit it.copy: denoted by an icon of two sheets of paper, this will use the schema as a template for a new schema.type: lists the schema type, which in turn helps describe the schemaname: a human readable name that will be shown when adding the schema to the project.source: lists the schema source (i.e. mppw or user)delete: denoted by a trashcan icon, this allows the user to delete the schema. It is only available for user-made schemas.
Clicking on the edit, copy, or new operation/artifact schema buttons will all open the schema editor view. This is a textfield holding a json object describing the schema. This is heavily customizable to define nearly any possible artifact/operation.
Configure Page
url: http://localhost:8000/ui/index.html#/config
The configuration view presents the user with two tabs, one for editing project metadata the other for editing user metadata.
Project Configuration Tab
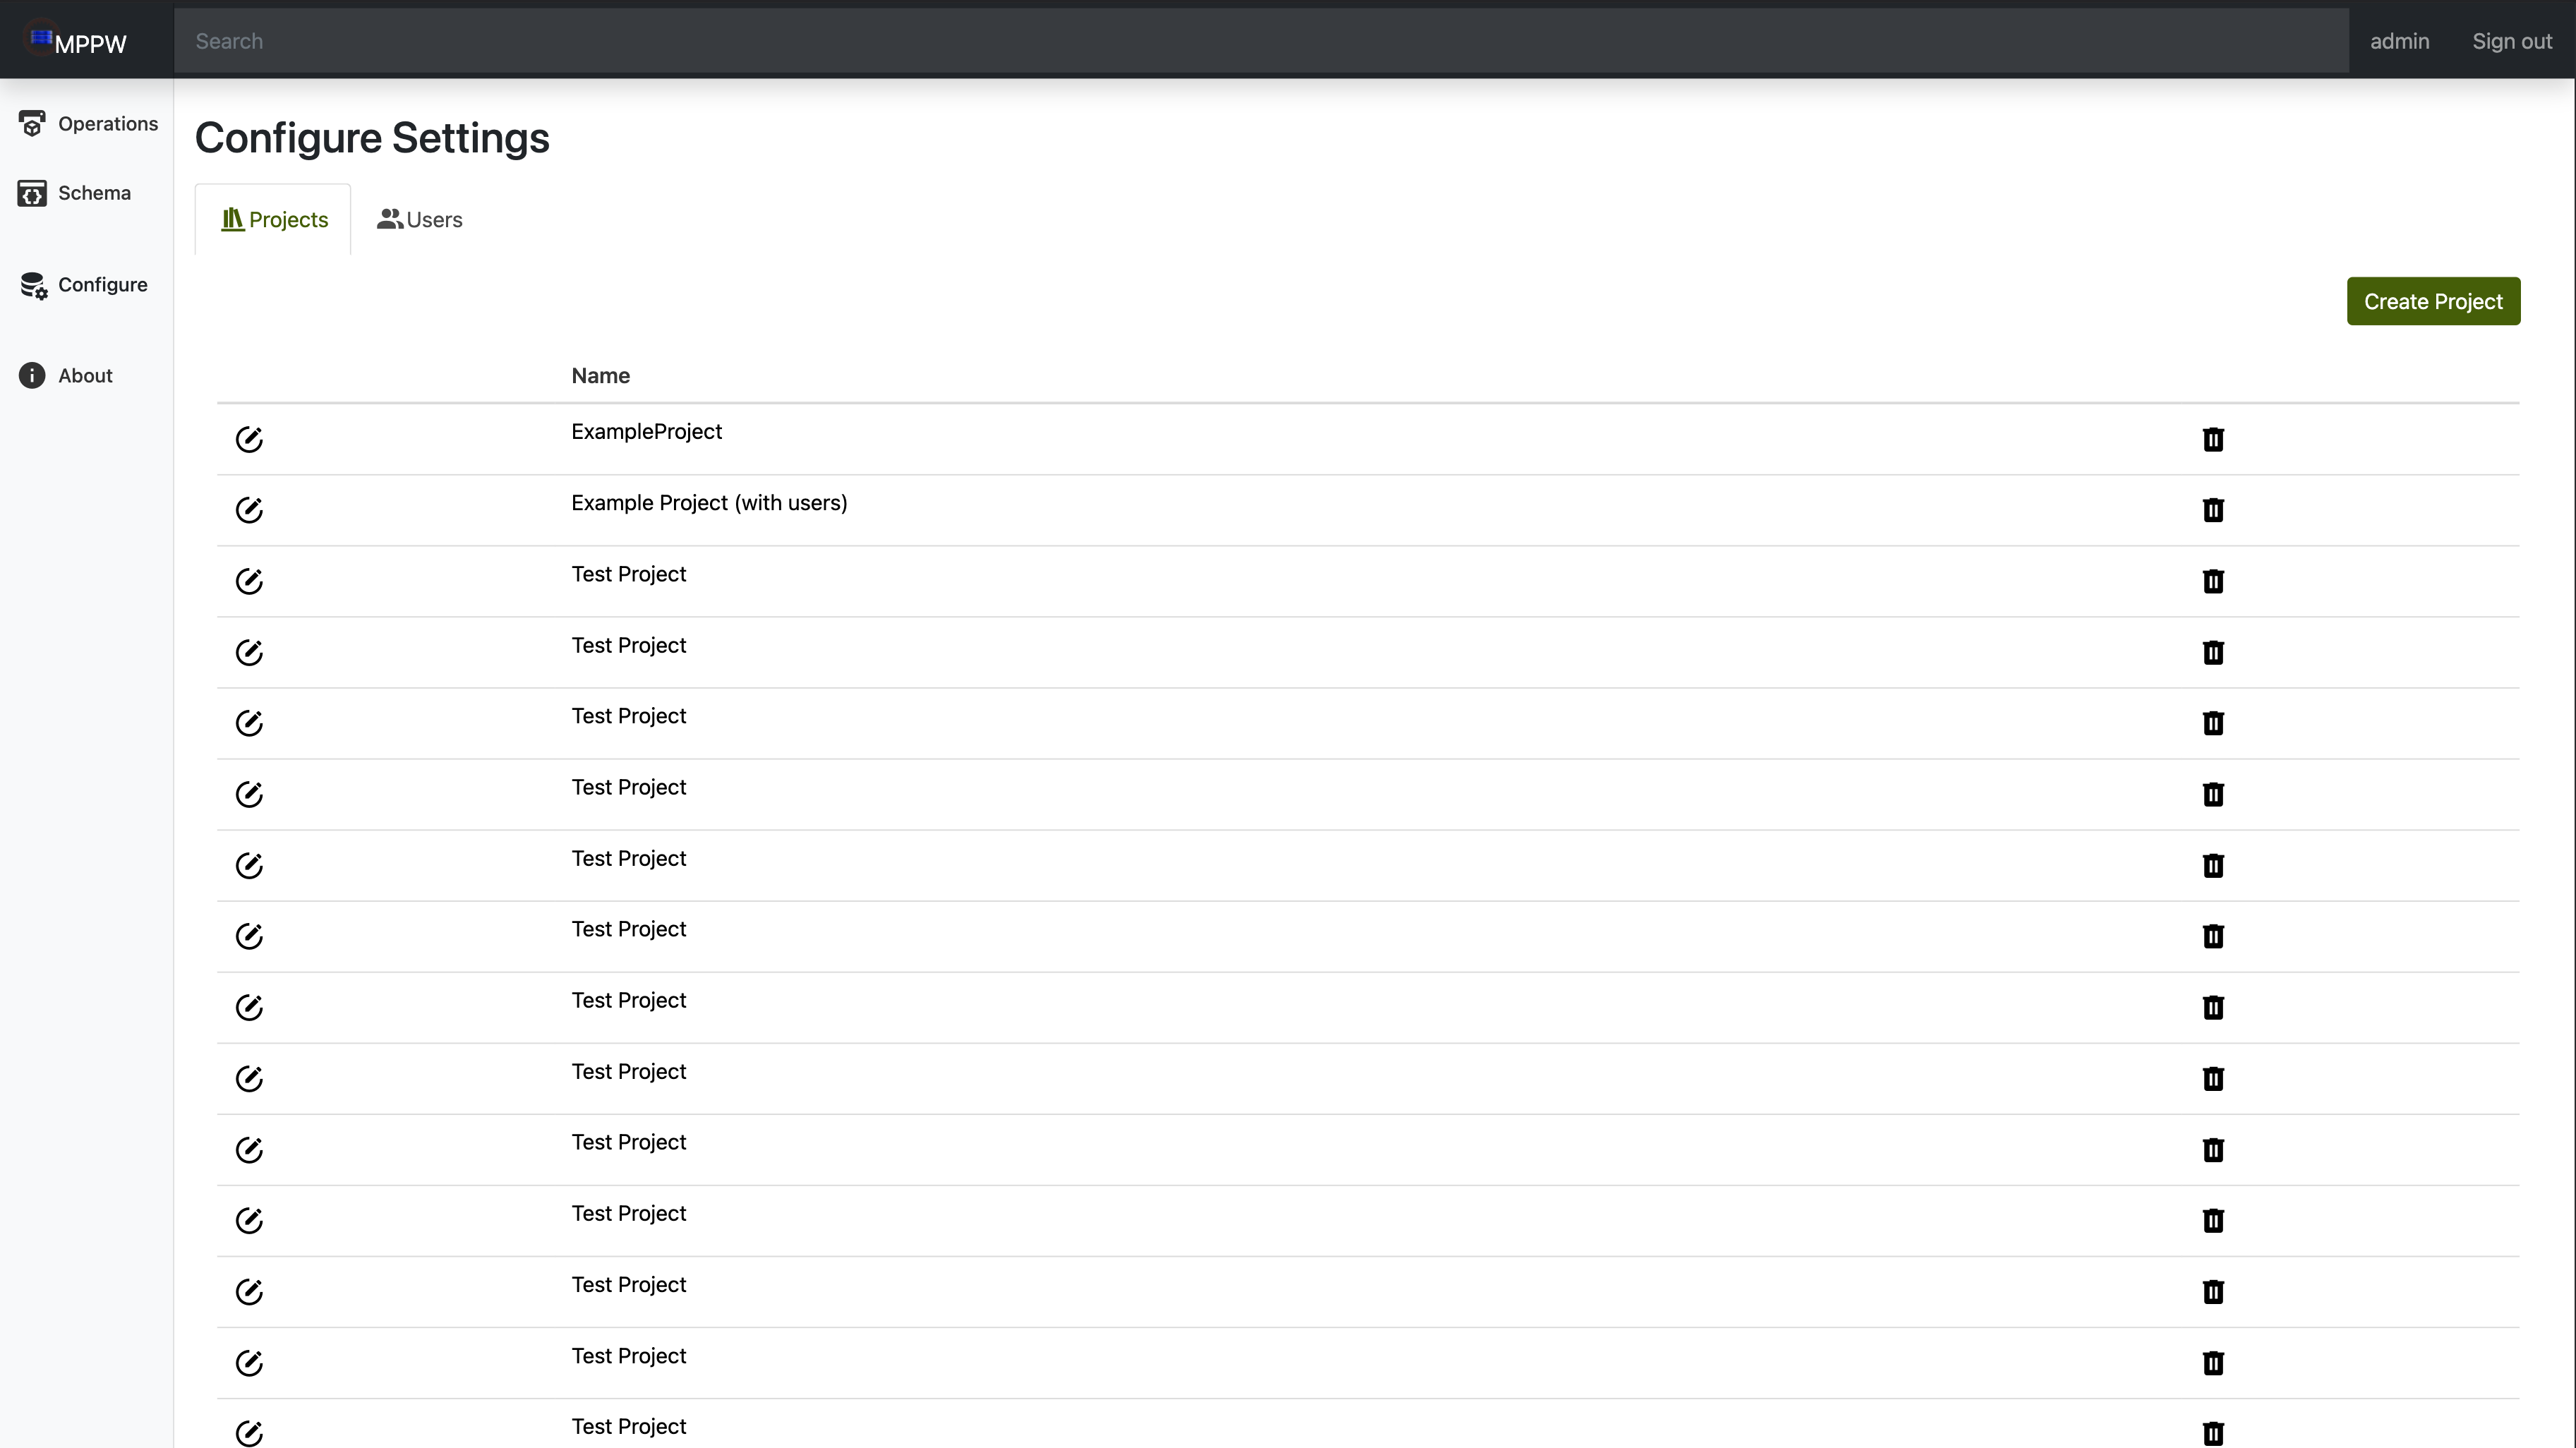 Beginning with the project configuration tab, there is a large table that holds
references to all existing projects. In each row of the table there is an
edit button that opens a dialog for changing the project name and description.
Additionally, each row features a delete button that allows for the
removal of a project. In addition to the table of projects there is a
Beginning with the project configuration tab, there is a large table that holds
references to all existing projects. In each row of the table there is an
edit button that opens a dialog for changing the project name and description.
Additionally, each row features a delete button that allows for the
removal of a project. In addition to the table of projects there is a create
project button that opens a dialog to create a new project. A new project
may be created by simply supplying a name and optionally a description.
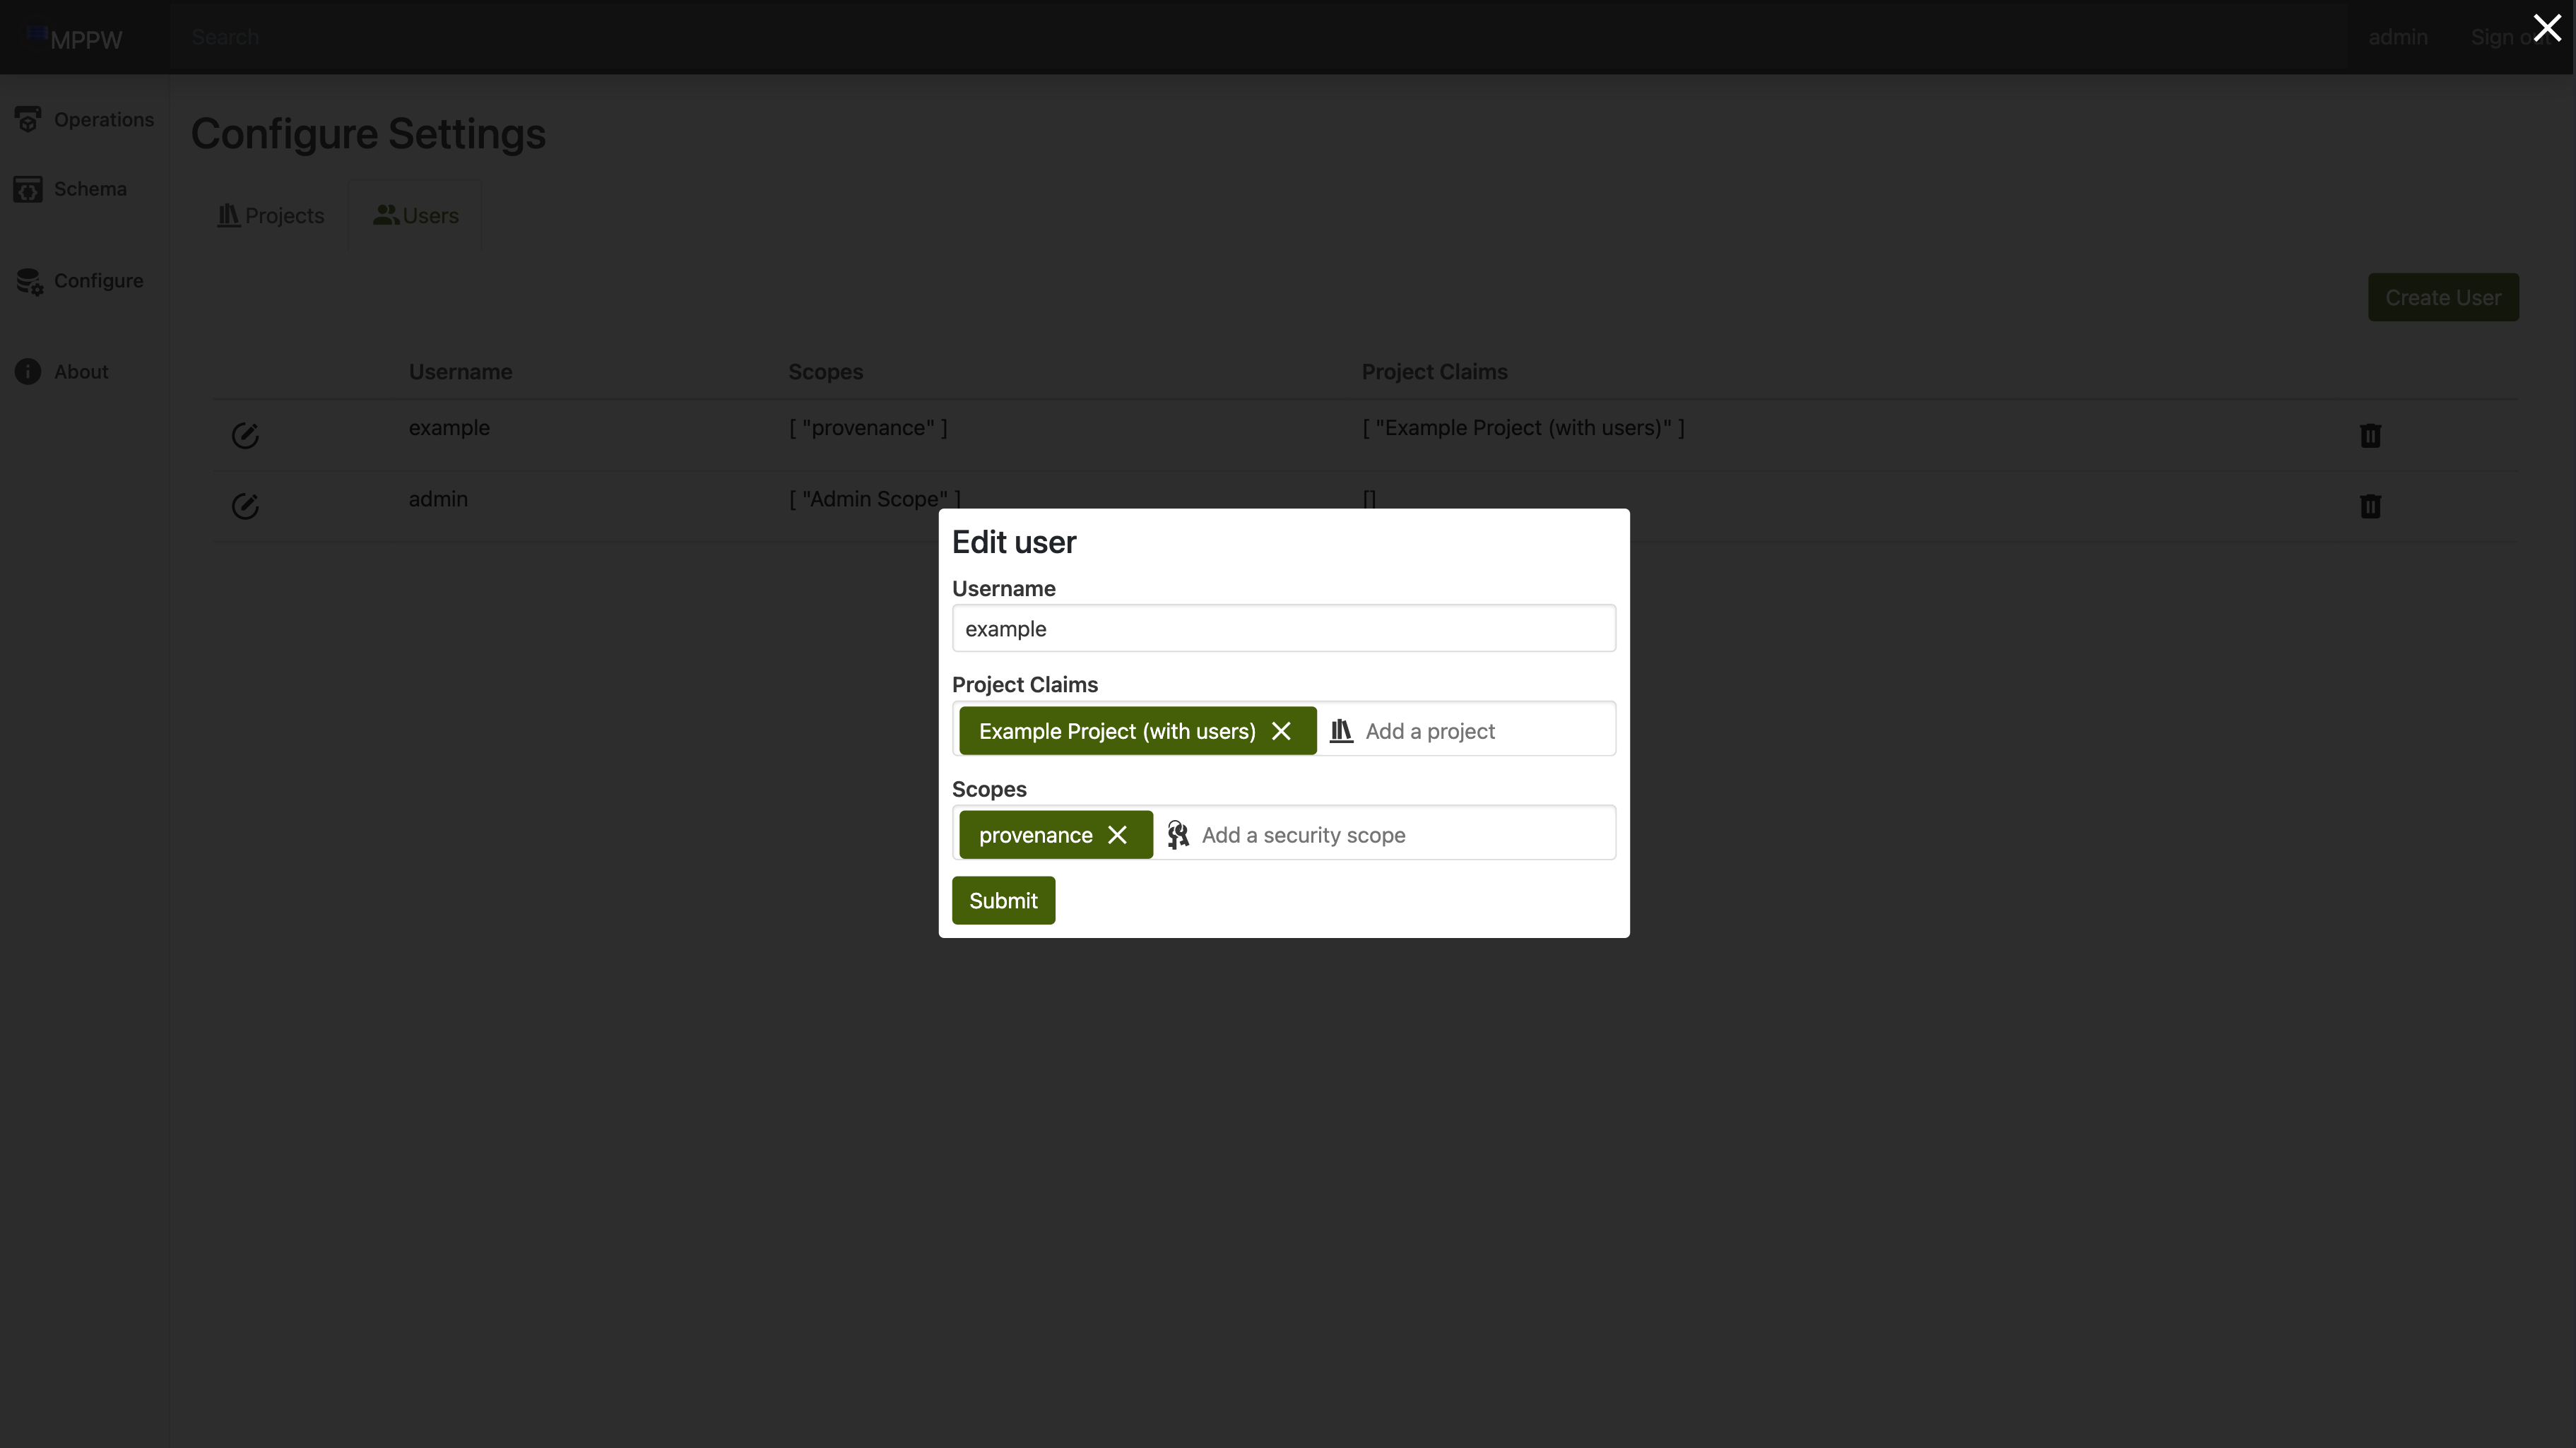
User Configuration Tab
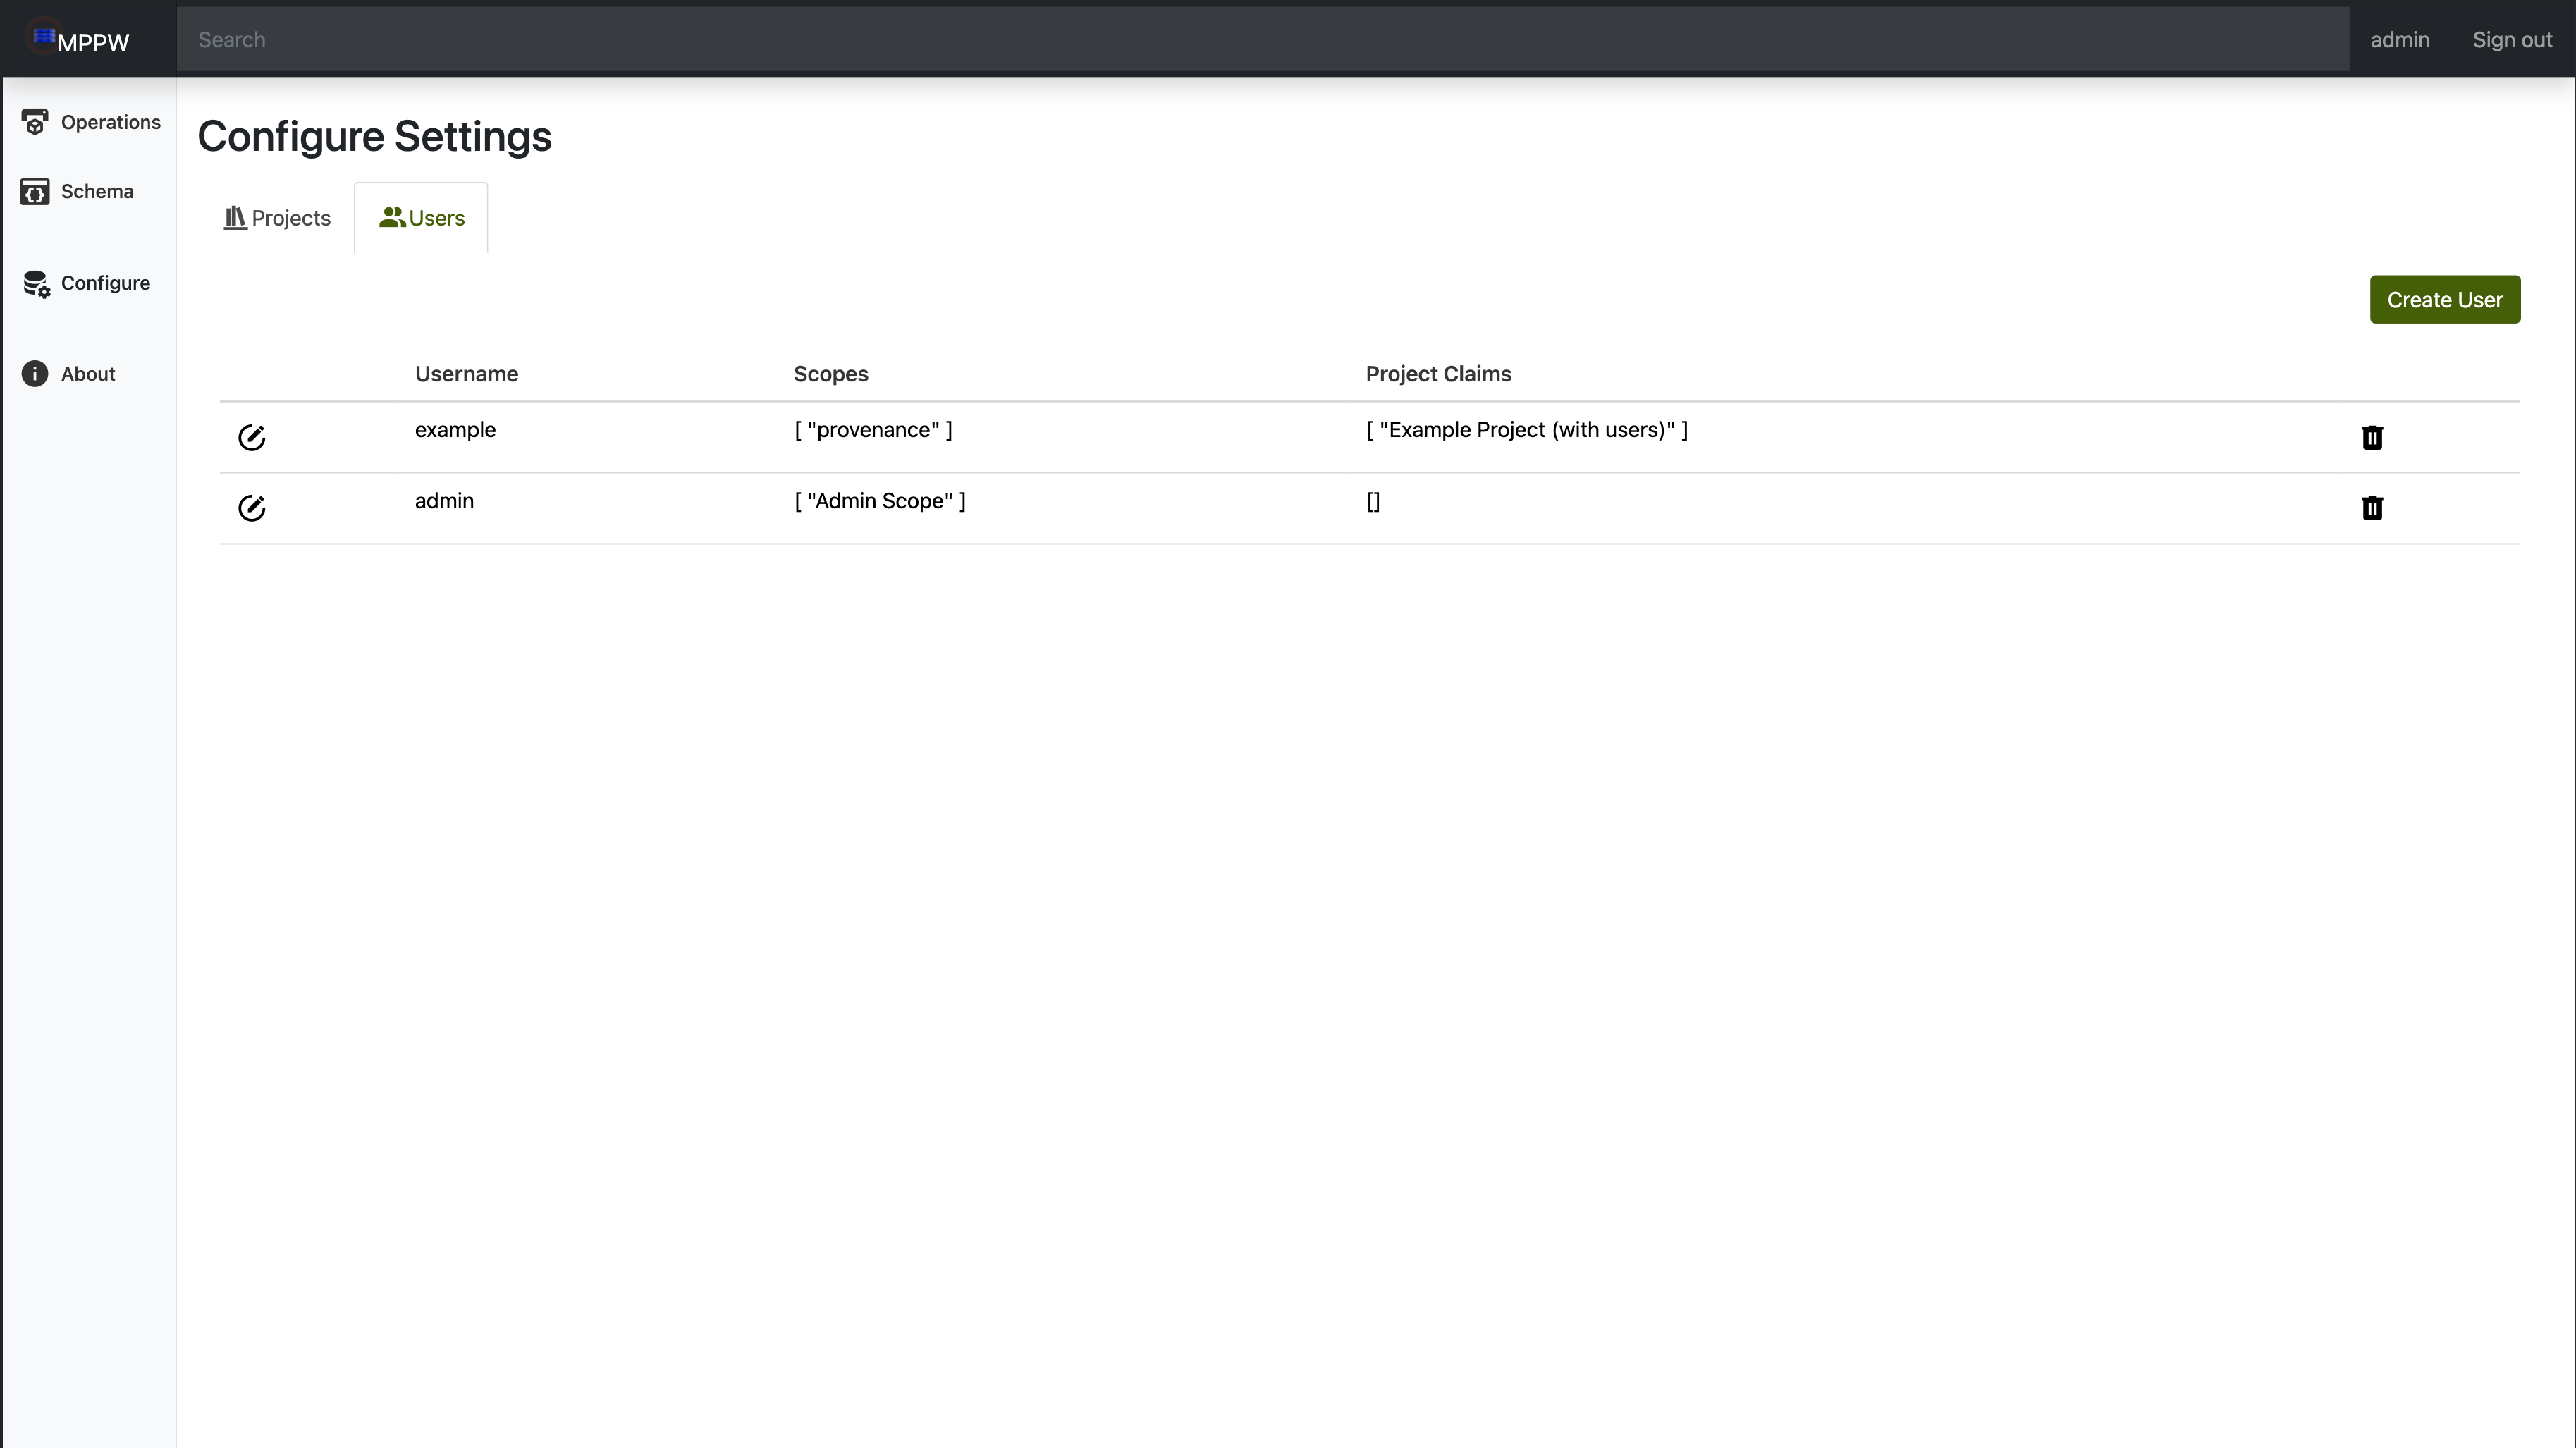 On the user configuration tab, there is a large table that holds
references to all existing users. In each row of the table there is an
edit button that opens a dialog for changing the username, associated projects,
and permissions.
On the user configuration tab, there is a large table that holds
references to all existing users. In each row of the table there is an
edit button that opens a dialog for changing the username, associated projects,
and permissions.