Deploying the Warehouse Stack
The full MPPW stack is deployed via a set of images available at a release repository. For the purposes of this document it is assumed the repository is registry.gitlab.com/composites-maine-edu/advancing-rapid-prototyping/material-process-warehouse and the username is gitlab-user.
The overall deployment process is simple, but the images may be several GiB in size.
Prerequisites
- Docker and Docker Compose (for Linux or WSL)
Recommended Hardware
The MPPW stack can be deployed on any kind of system which can run x86/64 Linux-based Docker containers.
The database components are the performance bottlenecks and perform best with memory proportional to the active working set - I/O-optimized hardware is recommended. By default, all data collected from manufacturing operations is stored in the data warehouse database, so the warehouse storage should be sized by estimating the amount of data each operation will collect x estimated number of operations. Image and video data collection usually dominates storage.
Currently the warehouse software images do not provide automatic data scale-out options, but the warehouse can run on any external MongoDB 4.x instance. Support for sharded collections is possible but not yet tested.
The file system managing the Docker container volumes contains the full state of the running warehouse. In production deployments, this file system may either support snapshots (for live backups) or, alternately, periodic read-only downtime. Best practice is a local backup as well as a remote backup if the underlying file system block storage is not itself durable. NFS file systems traditionally interact badly with databases.
For an isolated compute environment, the JupyterHub components of the warehouse may be deployed separately on compute-optimized hardware with network access to the warehouse. This is recommended for production deployments.
Quickstart
Setup remote image repository
A remote repository can be used from the command line in docker using the login command with proper credentials:
$ docker login registry.gitlab.com -u gitlab-user
Password:
...
If using
registry.gitlab.comvia a GitLab user that has external or 2-factor authentication enabled, a GitLab Personal Access Token must be generated and used as the password.To use docker repositories from unverified domains see
docs.docker.
Once logged in, docker images of the form registry.gitlab.com/composites-maine-edu/advancing-rapid-prototyping/material-process-warehouse/ascc/* are available to pull.
Pull warehouse images
In order to speed up further steps, it is a good idea to pull down the large images to your local docker instance as the first step. This isn't strictly necessary, but it makes debugging any issues simpler:
$ export MPPW_VERSION=0.12.0
$ docker pull registry.gitlab.com/composites-maine-edu/advancing-rapid-prototyping/material-process-warehouse/ascc/mppw:$MPPW_VERSION
...
$ docker pull registry.gitlab.com/composites-maine-edu/advancing-rapid-prototyping/material-process-warehouse/ascc/mppw-mongodb:$MPPW_VERSION
...
$ docker pull registry.gitlab.com/composites-maine-edu/advancing-rapid-prototyping/material-process-warehouse/ascc/mppw-nginx:$MPPW_VERSION
...
$ docker pull registry.gitlab.com/composites-maine-edu/advancing-rapid-prototyping/material-process-warehouse/ascc/mppw-jupyterhub:$MPPW_VERSION
...
Alternate load of warehouse images from files
If direct registry access is not possible, Docker images may also be loaded as .tar(.gz) files from any filesystem - to do so first download the -mppw-X_Y_Z.tar.gz, -mppw-mongodb_X_Y_Z.tar.gz, -mppw-nginx_X_Y_Z.tar.gz, and -mppw-jupyterhub_X_Y_Z.tar.gz images to the target system. The images can then be loaded into docker via:
$ docker load < image_file.tar[.gz]
Note that this command, by default, will only load Docker images onto the machine-local Docker instance. To load images onto a remote machine, it is possible to use the
$DOCKER_HOSTvariable.
Extract warehouse stack
The full MPPW stack is defined in a configurable docker-compose file - this file is included in the ascc/mppw images. To extract it, run:
$ docker run --rm --entrypoint cat \
    registry.gitlab.com/composites-maine-edu/advancing-rapid-prototyping/material-process-warehouse/ascc/mppw:$MPPW_VERSION \
      ./compose.yml > mppw-stack.yml
Deploy warehouse stack
All configuration of the MPPW deployments happens via environment variables. The ones that are mandatory to set are:
MPPW_VERSION- mandatory for a versioned deployment, otherwise defaults todevMPPW_REPOSITORY_PREFIX- the repository prefix used above, for exampleregistry.gitlab.com/composites-maine-edu/advancing-rapid-prototyping/material-process-warehouse/, to specify the images used. Re-tagging images is also possible. Note the trailing slash.MONGODB_ADMIN_PASSWORD- theadminuser password for the warehouse database, and, if not overridden, theadminuser password for the data warehouse API/UI
By running docker-compose with these variables, the stack can be created (and safely upgraded) with:
$ export MPPW_REPOSITORY_PREFIX=registry.gitlab.com/composites-maine-edu/advancing-rapid-prototyping/material-process-warehouse/
$ export MONGODB_ADMIN_PASSWORD=pick-a-better-password
$ docker-compose -p mppw -f mppw-stack.yml up
Navigate in a browser to http://localhost/version to see the API working.
Other variables that may be useful to set are:
MPPW_ADMIN_PASSWORD- overrides and ensures a different password for the data warehouse API/UI
If deploying the JupyterHub service to different hardware than the database and API/UI:
AUTHENTICATOR_MPPW_URL- overrides theMPPW_URL(ending with /api) that JupyterHub authenticates againstMPPW_PROXY_ENABLED/JUPYTERHUB_PROXY_ENABLED- if set to 0/1, disables/enables http/s access to the warehouse API/UI and the JupyterHub analysis service, respectively
Managing deployments
In order to make it simple to manage deployments, the above steps may be combined, stored, and version-controlled in a customized deployment script such as the one at scripts/manage_deployment.sh:
$ scripts/manage_deployment.sh config
0.12.0: Pulling from ascc/mppw
Digest: sha256:87636e4b22e7d23639e7c666285c64fc4ef1016230645ab3a1bc20fc0272974b
Status: Image is up to date for registry.gitlab.com/composites-maine-edu/advancing-rapid-prototyping/material-process-warehouse/ascc/mppw:0.12.0
...
name: mppw
services:
  jupyterhub:
    environment:
...
The example manage_deployment.sh invokes docker-compose with whatever arguments are passed in at the command line. For example, to check the mppw API/UI and nginx ingress controller logs:
$ scripts/manage_deployment.sh logs mppw nginx
As another example, the common case of upgrading the API/UI only without restarting the other services would be:
$ scripts/manage_deployment.sh up -d mppw
As another example, to login to the MongoDB database:
$ scripts/manage_deployment.sh exec -it mongodb mongo
Essentially all docker commands are available with docker-compose service aliases.
NOTE that running
down -von a managed deployment will wipe all data, irrecoverably. If a deployment is sensitive, consider adding double-checks of dangerous commands to any scripting (and backups).
Alternate Management via .env Files
Alternately, as a simpler approach, it may be useful to create and version .env-my.hostname.xyz files which just include the relevant DOCKER_HOST, MONGODB_ADMIN_PASSWORD, and other values in one place. This allows you to source these values together into your environment and not remember them individually every time while using standard docker-compose tools.
The DOCKER_HOST variable
It is often very convenient to manage deployments on remote hosts with docker via an SSH connection - to do this, simply set the DOCKER_HOST to ssh://my.hostname.xyz. All subsequent docker commands will then be sent to the remote docker daemon.
NOTE this can be confusing if not managed well - shell extensions are recommended to make the state of
DOCKER_HOSTvisible when it is set. Alternately deployment scripts should always report this information loudly.
Credentials
The deployment variables are not permanently stored anywhere in the stack, by design - if the MONGODB_ADMIN_PASSWORD is lost there is no recovery mechanism possible for the data. For that reason, it is highly encouraged to save either the deployment scripts or at least the password to one or more secure locations. Restarting the database with a different admin password is currently untested and should be avoided.
Alternate deployment via direct image copy
Sometimes a remote host may have different or limited access to the docker repository at docker-images.composites.maine.edu or elsewhere. In this case, instead of pulling directly we can pull the images locally and then copy them to the remote docker host using the form:
$ docker pull registry.gitlab.com/composites-maine-edu/advancing-rapid-prototyping/material-process-warehouse/ascc/mppw:$MPPW_VERSION
$ docker save registry.gitlab.com/composites-maine-edu/advancing-rapid-prototyping/material-process-warehouse/ascc/mppw:$MPPW_VERSION | bzip2 | pv | \
    ssh user@limited.host.xyz docker load
Once the images are copied to the remote host the rest of the deployment can be managed from a remote DOCKER_HOST as usual.
Advanced JupyterHub deployment
The MPPW stack includes a JupyterHub service pre-configured to authenticate against the MPPW, however
often it is best practice to deploy the sandbox notebook service separately from the data storage and API
services. In order to do so, first, bring up only the mppw, mongodb, and nginx services via docker-compose on the warehouse host.
$ export MPPW_REPOSITORY_PREFIX=...
$ export MONGODB_ADMIN_PASSWORD=...
$ export JUPYTERHUB_PROXY_ENABLED=0
$ docker-compose -p mppw -f mppw-stack.yml up -d mppw mongodb nginx
This will not start the JupyterHub service and will not proxy web requests. On the JupyterHub host, similarly run:
$ export MPPW_REPOSITORY_PREFIX=...
$ export MONGODB_ADMIN_PASSWORD=...
$ export MPPW_PROXY_ENABLED=0
$ export AUTHENTICATOR_MPPW_URL=https://warehouse-host-name/api
$ docker-compose -p mppw -f mppw-stack.yml up -d nginx jupyterhub
This will start the JupyterHub environment on the host and link authentication back to the warehouse host.
Advanced API deployment
The API services (mppw, nginx) of the data warehouse can also be deployed separately - this is done
by setting the MONGODB_URL to a different value pointing at another MongoDB host. Separate service deployment is done similarly to the JupyterHub case - see the compose.yml file for more details.
Authentication Integrations
Often a warehouse deployment will need single-sign-on (SSO) support with an existing identity provider - supported protocols are listed below:
- OpenID Connect (via OAuth2)
OAuth2/OpenID Connect (OIDC)
OIDC is a well-supported, modern identity protocol which standardizes identity information provided by OAuth2 flows. Full documentation of OIDC is out of scope for this guide, but the basics of the technology are:
-
A named "application" is registered with the OAuth2/OIDC provider (i.e. Google, Azure AD) along with one or more application callbacks to secure endpoints. HTTPS is generally a requirement for applications using OAuth to prevent credentials being leaked or redirected. A
client_idandclient_secretare associated with an application by the provider. -
The application (i.e. this data warehouse) is configured with the
client_idandclient_secretalong with OAuth endpoints - often conveniently provided via a single metadata url such as:
https://accounts.google.com/.well-known/openid-configuration
- To delegate authentication to a provider, the application redirects a user to the login endpoint of the provider (specified by the metadata url) with the
client_id. On completion of login the provider sends an access code for a token (in the OAuth code flow) back to a registered application endpoint. The application then uses theclient_secretto fetch an access token and identity information from the provider and maps the information in a variety of ways to the application userbase.
For single-page web applications (SPAs) backed by an API such as the data warehouse web UI, technically the SPA receives the provider callback but forwards the code to the authenticating API.
Registering OAuth2/OIDC providers in the MPPW
In order to configure the MPPW for SSO via OAuth/OIDC, first the warehouse must be registered as an OIDC application in a provider-specific way. The application callback should be registered as:
https://<hostname>/ui/index.html+security+oauth2+providers+<provider_name>+auth
(and for testing, if required:)
http://localhost/ui/index.html+security+oauth2+providers+<provider_name>+auth
https://localhost/ui/index.html+security+oauth2+providers+<provider_name>+auth
Next, appropriate environment variables must be set for the MPPW application (via Docker, Docker Compose, or another mechanism). By default, the MPPW deployment is configured to look in the /etc/oidc directory for <provider_name>.json5 files that contain per-provider configuration. The content of one of these files is of the format:
{
  "name": "my_azure_provider", // Optional
  "display_name": "Azure",
  "display_icon": "https://upload.wikimedia.org/wikipedia/commons/thumb/f/fa/Microsoft_Azure.svg/2048px-Microsoft_Azure.svg.png",
  "client_id": "client-idinsomeform-goeshere",
  "client_secret": "a.bigclientsecretgoeshere",
  "server_metadata_url": "https://azure/some/path/to/.well-known/openid-configuration",
  "first_login_user_config": { "allowed_scopes": ["read:provenance"] }, // Optional
}
The provider
namefield is optional and can be inferred by the filename.For Azure AD/Entra users, a
client_secret_idfield may also be required.
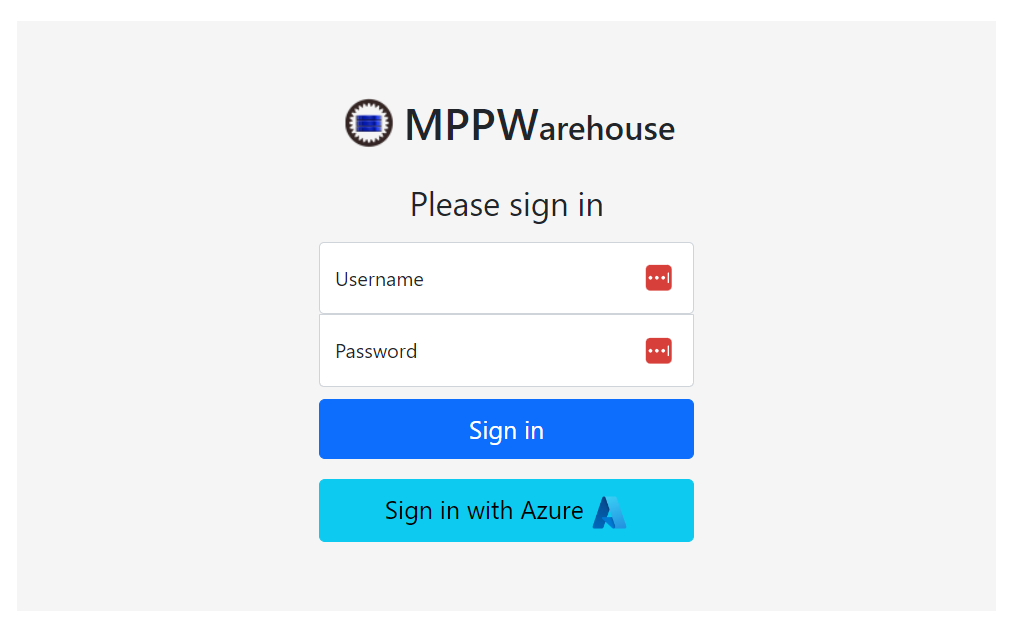
With the above configuration, the OIDC provider appears on the login page:
Configuring new users on first login
The first_login_user_config field is optional and indicates that, on login, if a user is not found matching the OIDC information from the provider a new user should be created. If it is not present a user must be linked to provider users manually before provider login will succeed.
If the config is present, as above, a new user corresponding to the provider user will be created the first time the provider user logs in and the details in the config will be applied to the new user. Generally the allowed_scopes field is most relevant but local_claims.project or other claims can also be configured.
Without
read:provenancescope the user will not have access to the general UI so this is recommended at this time. The scope will not provide any access to project data, just the ability to access endpoints to query project listings.
The new user created will have their MPPW username set to the OIDC preferred_username claim if present, otherwise email or sub will be used. The username may be changed by an admin at a later time as well.
Linking MPPW users to provider users
In general, MPPW users are linked to provider users by specifying local oidc_users claims. This can be done in the web UI in the "Configure>Users" tab for existing users:
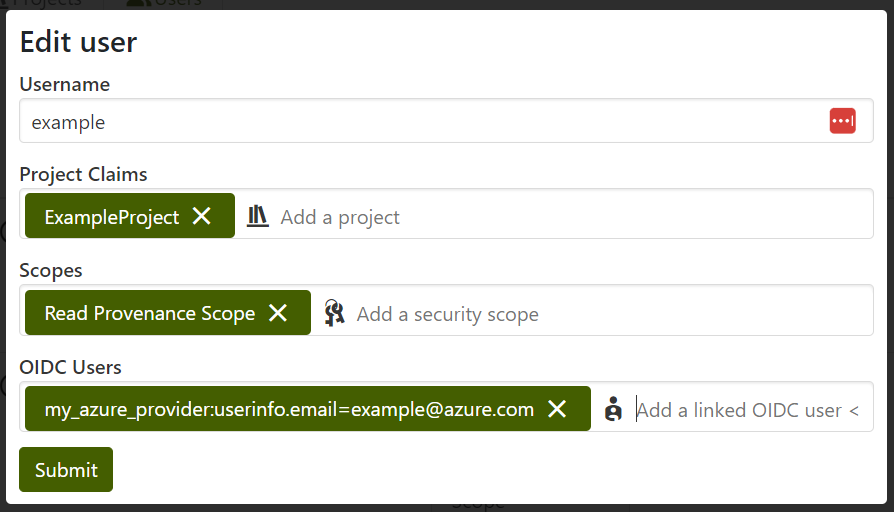
The format of these claims is <provider_name>:userinfo.<key>=<value>. Currently only OIDC sub and email keys are supported as they represent stable identifiers.
If only a certain group of provider users should be allowed to access the MPPW, these users can be configured ahead of time via this UI with appropriate projects and scopes.